SSH Keys Apple macOS
5 minute read
SSH Keys on macOS
What are SSH Keys?
SSH (Secure Shell) keys are an access credential that is used in the SSH protocol.
The private key (ie. id_rsa) remains on the system being used to access the HPCC cluster and is used to decrypt information that is exchanged in the transfer between the HPCC cluster and your system.
A public key (ie. id_rsa.pub) is used to encrypt information, and is stored on the cluster.
The authorized keys file that is stored on the HPCC cluster (ie. ~/.ssh/authorized_keys) contains one or more public keys (ie. id_rsa.pub).
Why do you need SSH Keys?
HPCC supports two authentication methods; Password+DUO and SSH Keys.
The Password+DUO method requires a UCR NetID, if you do not have one then you will need to use SSH keys in order to access the HPCC cluster.
Creating SSH Keys from the Command-line
By far the easiest way to create SSH keys on macOS systems is from the command-line following the instructions here. Users who prefer to do this in a graphical user interface can follow the instructions below.
GUI-based SSH Key Creation
Filezilla
You will need to install Filezilla in order to transfer the public SSH key to the HPCC cluster.
- Download the
Filezilla Clientfor Mac OS X here.- Make sure your Mac OS X system is updated to the latest version.
- Follow the install wizard to complete the install of
Filezilla.
Sourcetree
You will need to install Sourcetree in order to generate your SSH keys (or use the command line method mentioned here.
- Download
Sourcetreefrom here - Click on
Download for Mac OS X - Install
Sourcetree
Create SSH Keys (Sourcetree)
Open the
Sourcetreeapplication and under the topSourcetreemenu click on thePreferences...sub-menu item.
Navigate to
Accountscategory and click onAdd....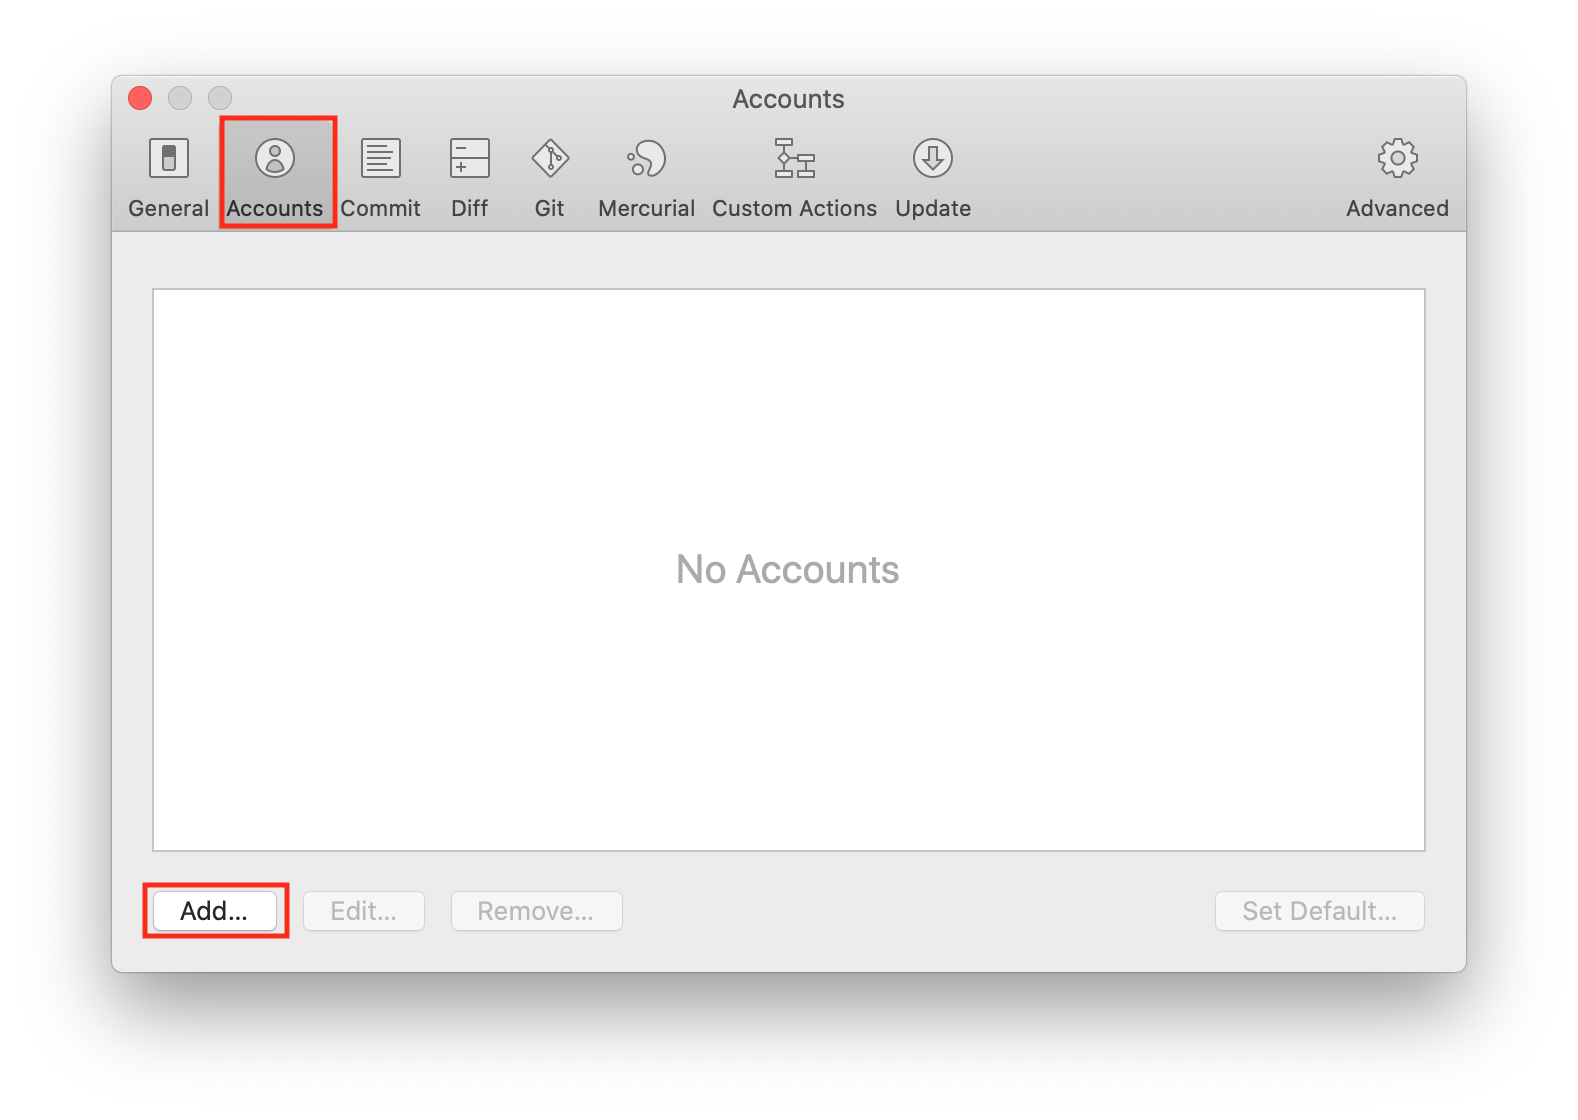
Click on
Auth Type:and change the drop down menu fromOAuthtoBasic. Make sureProtocol:is set toSSHin the drop down menu.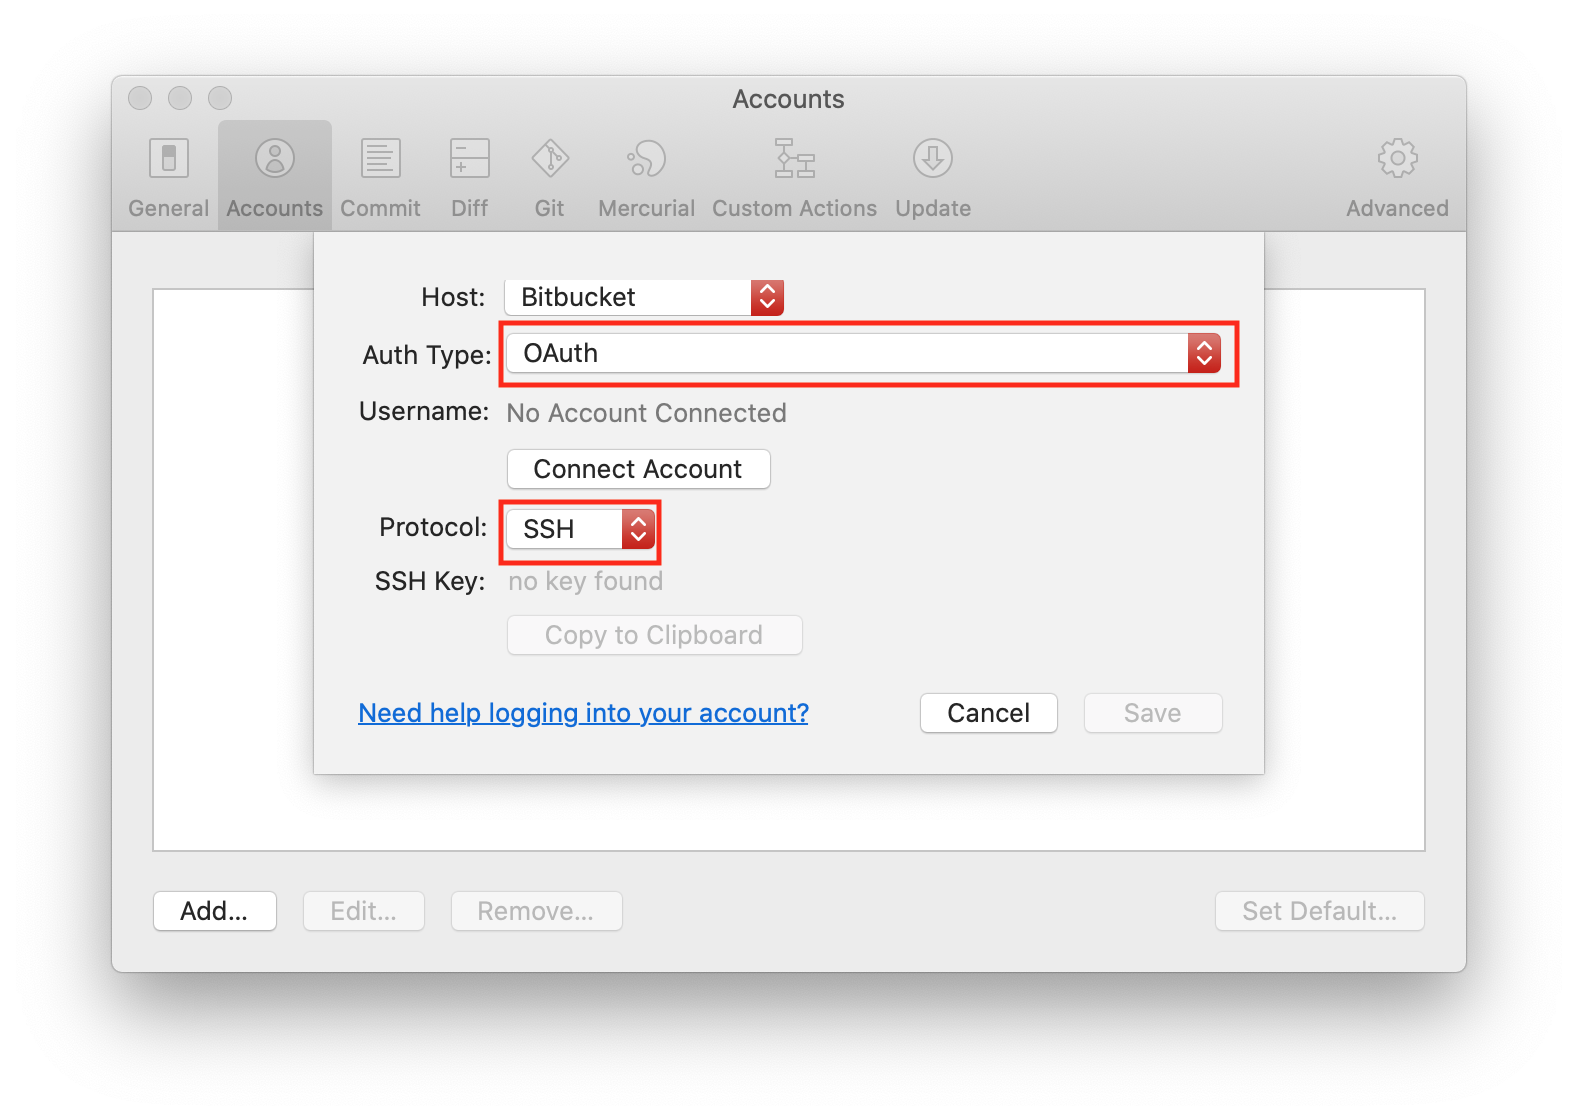
Enter
id_rsain theUsernamefield.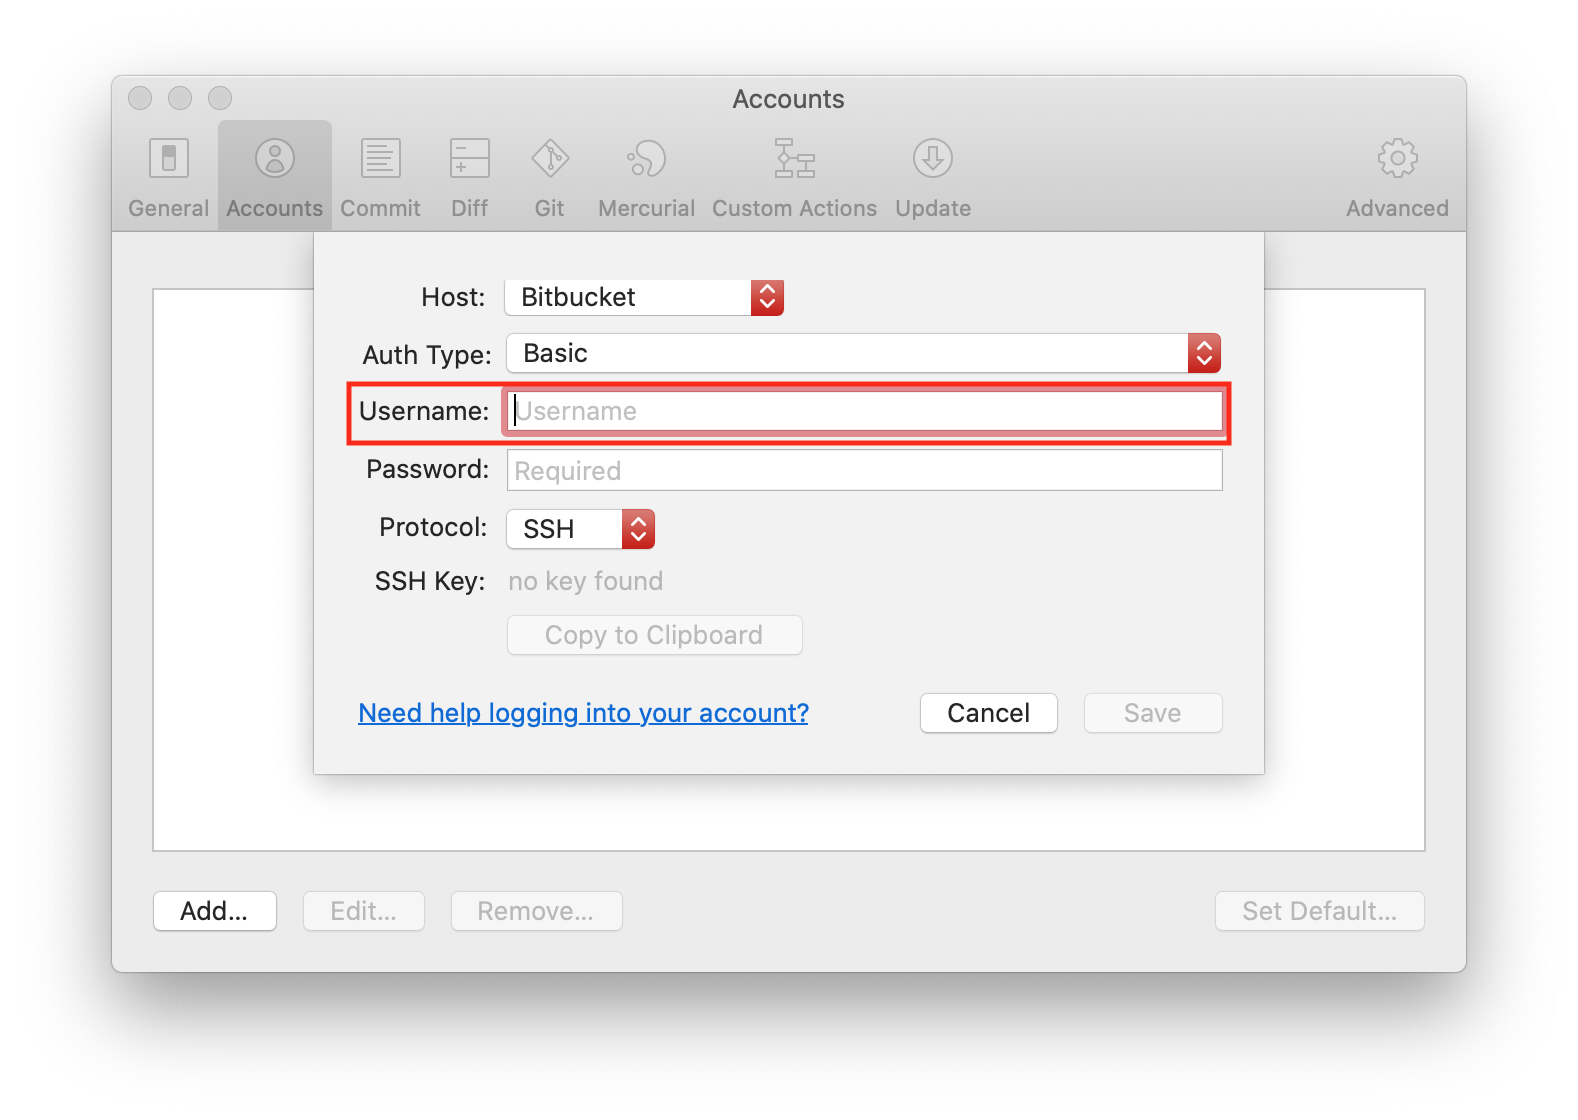
Click the
Generate Keybutton.
Press
Cancelto exit out of the window.
SSH Keys Location
By default, your key files are created in the path: /Users/macOSUsername/.ssh/.
To verify that the keys were created, do the following:
Open a new finder window. Click on your home directory on the left side pane.
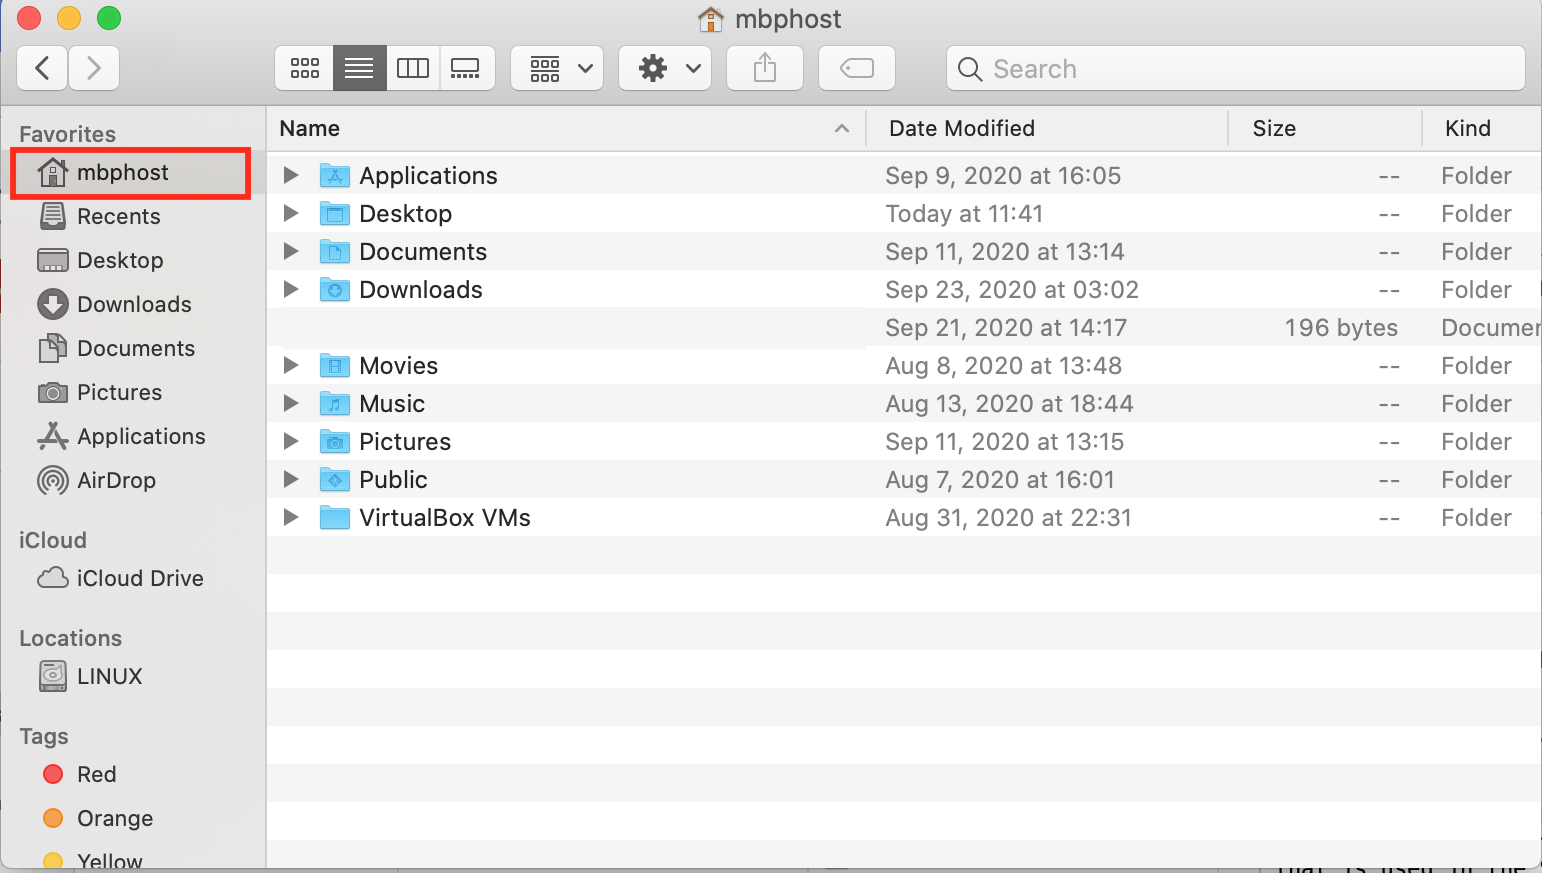
Press the 3-button combo
Command+Shift+.together (visualized below) to see hidden folders: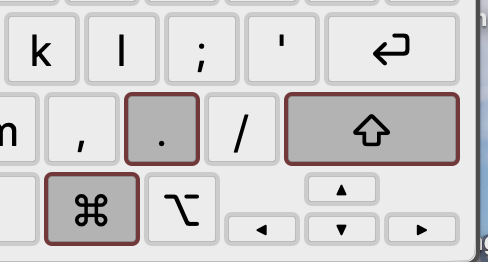
You will now be able to see your
.sshfolder, open it by double-clicking.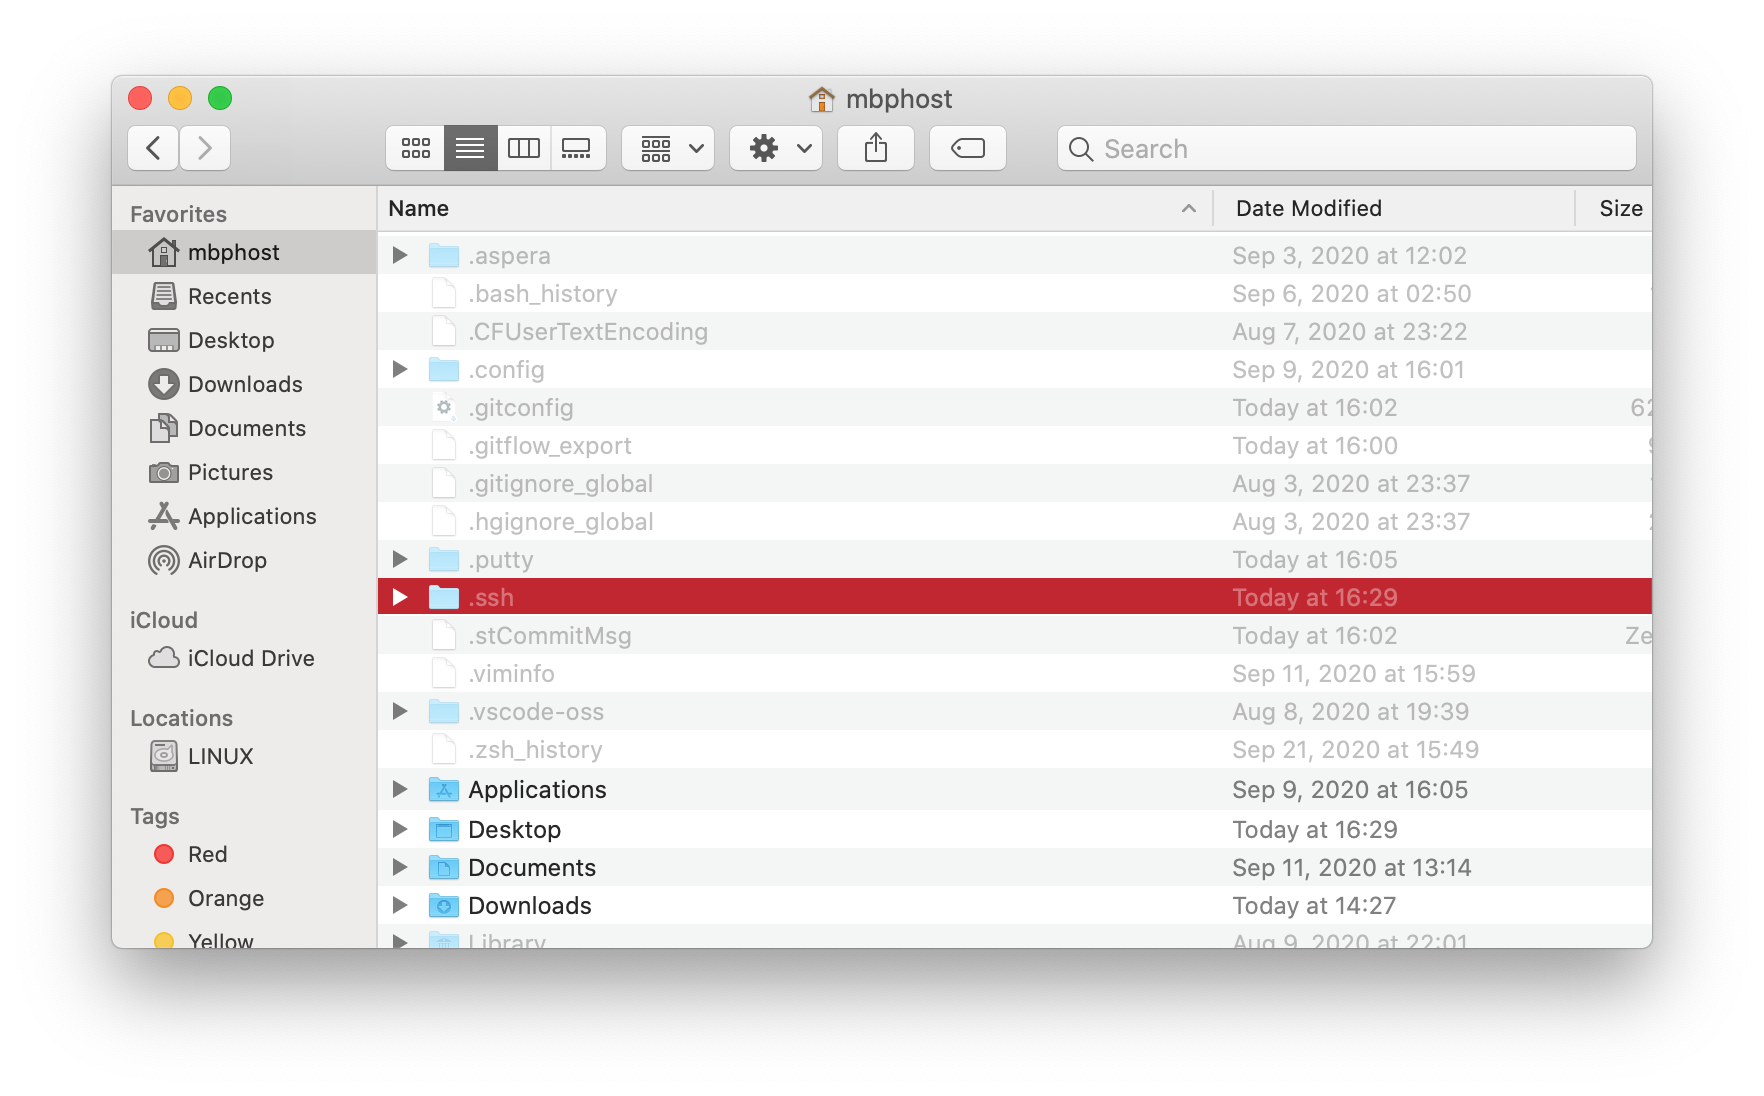
You should see your newly generated pair of
SSH keyfiles in the folder.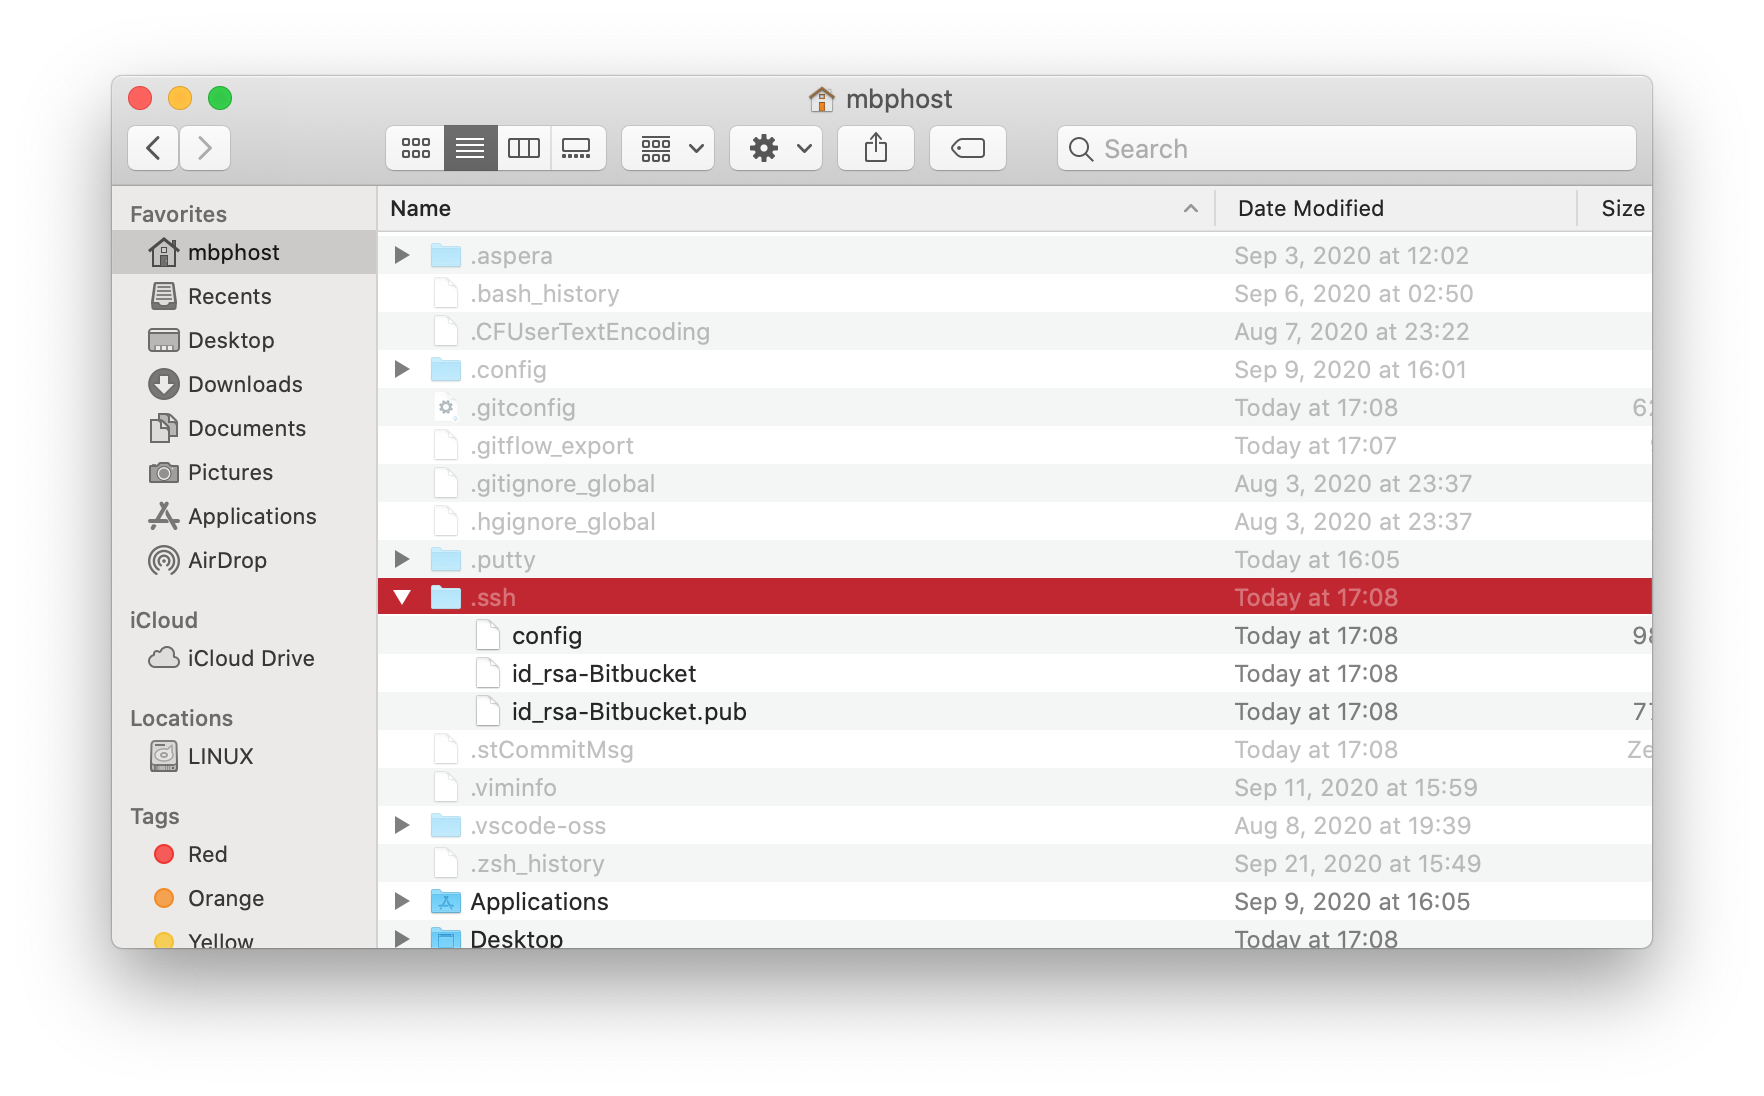
Sourcetree adds the
-Bitbucketto the end of theSSH keyfile names. Remove this by clicking on the file you want to rename and press theEnterkey which allows us to rename the file before the extension.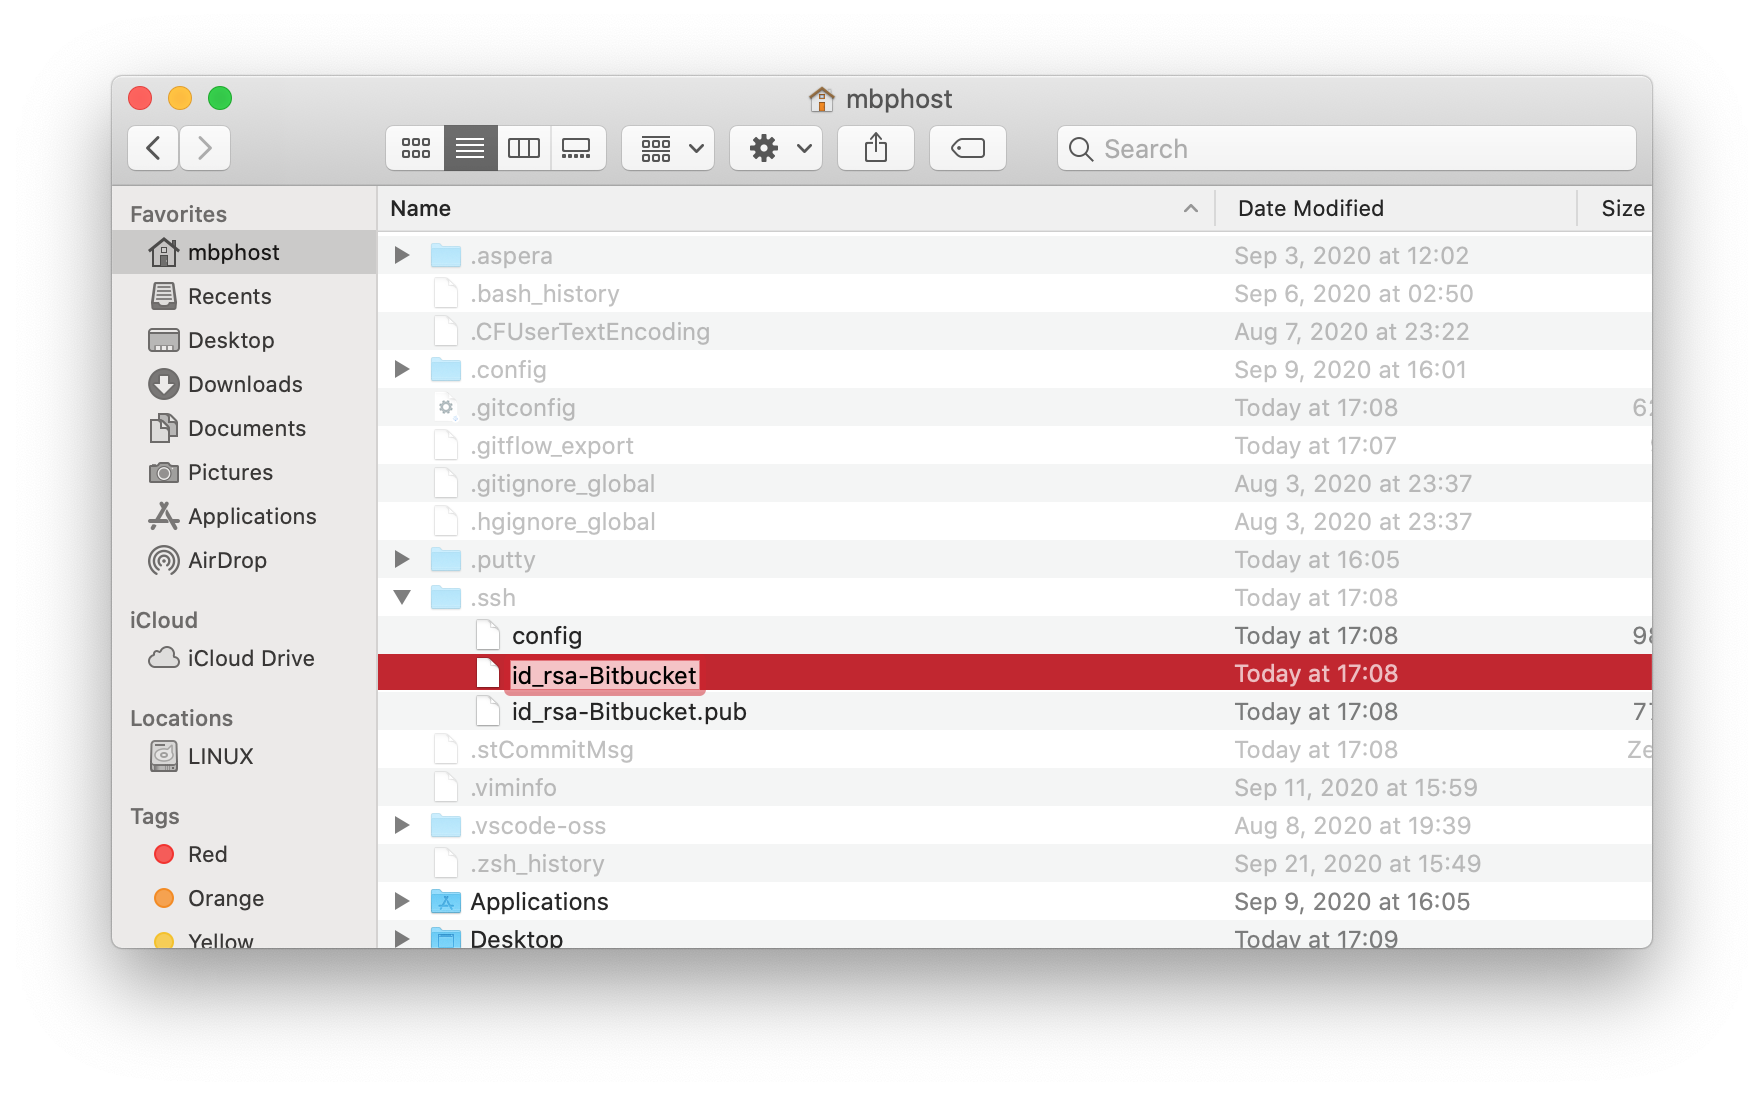
After you have removed the
-Bitbucketsuffix from each of theSSH keyfile names, your newSSH keyfile names should beid_rsaandid_rsa.pub.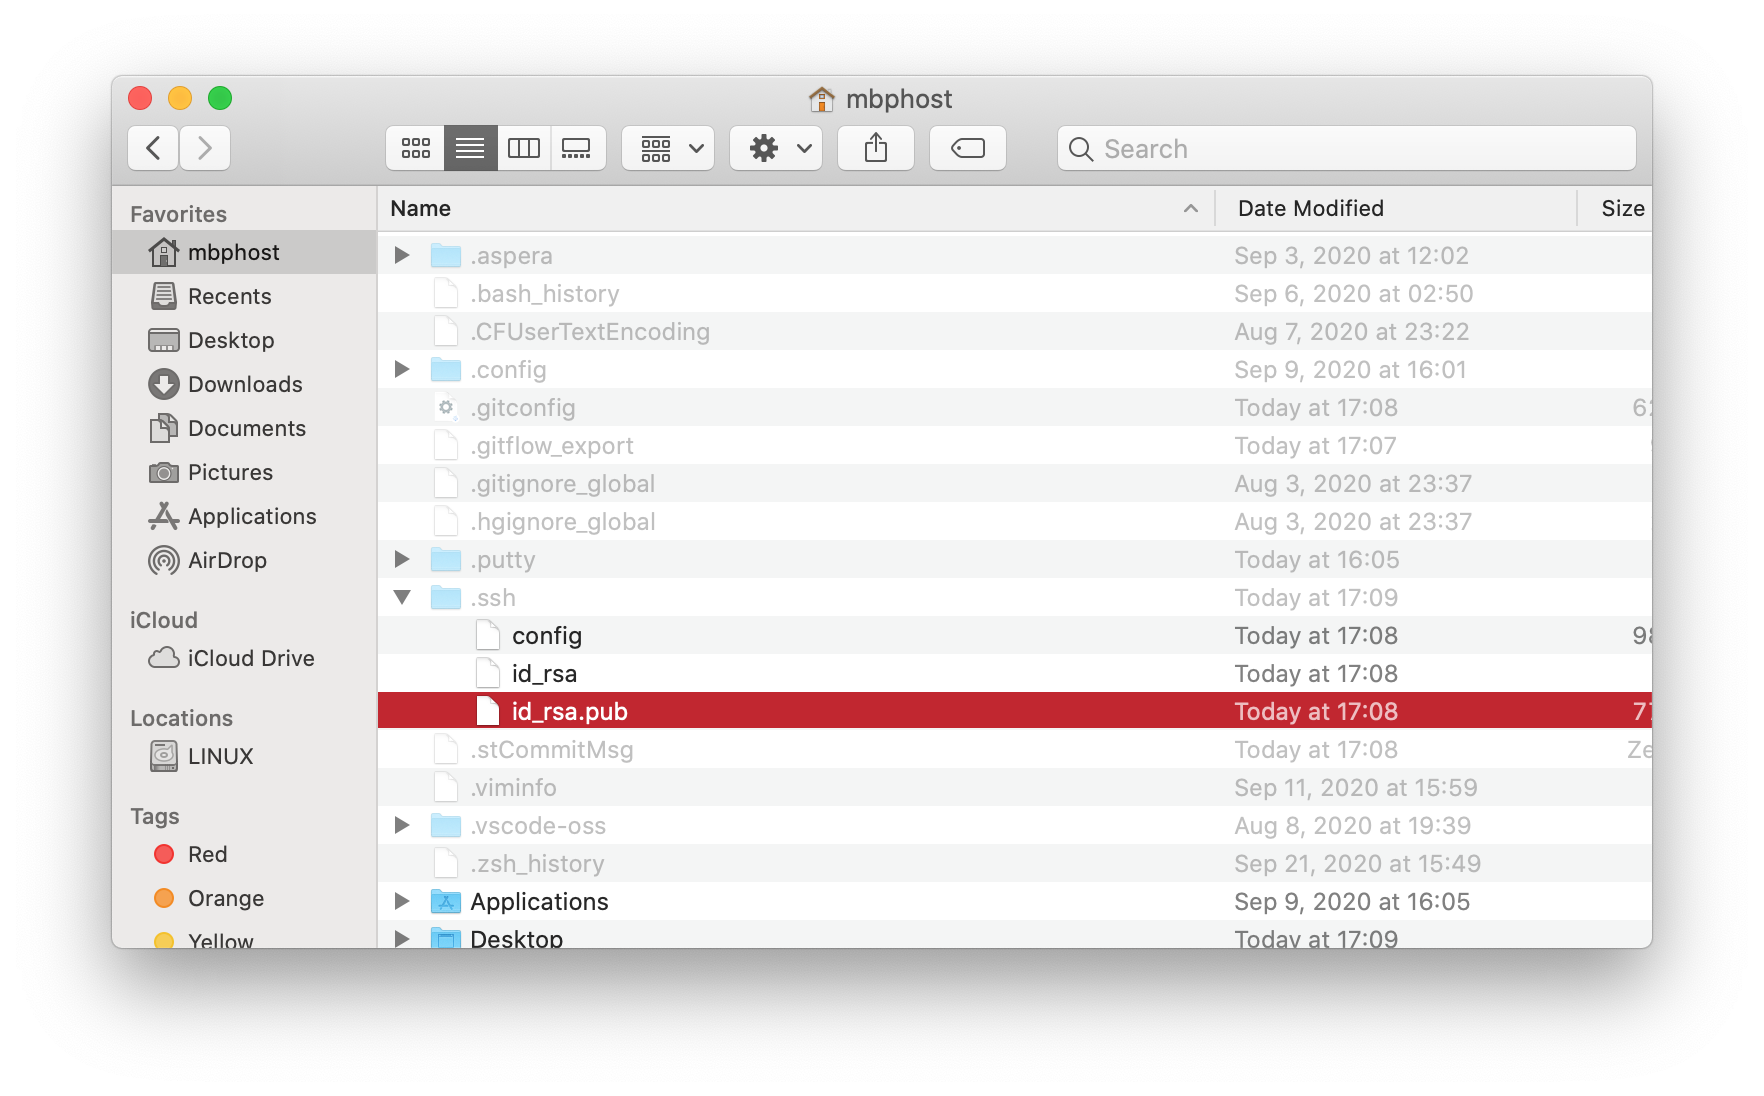
Configure SSH Keys
Public SSH Key
Now that you have created your SSH keys, and renamed them, you will need to place your public key (id_rsa.pub) on the cluster.
If you do not have a UCR NetID, or prefer not to use Password+DUO authentication, then email your public key (id_rsa.pub) to support and skip to Private SSH Key.
If you already have configured Password+DUO authentication, then proceed with the following:
Start the
Filezillaapplication.Open
Site Managerwindow by clicking the upper left most button in the top bar of icons.
Click on
New Site, which will unlock the fields to the right.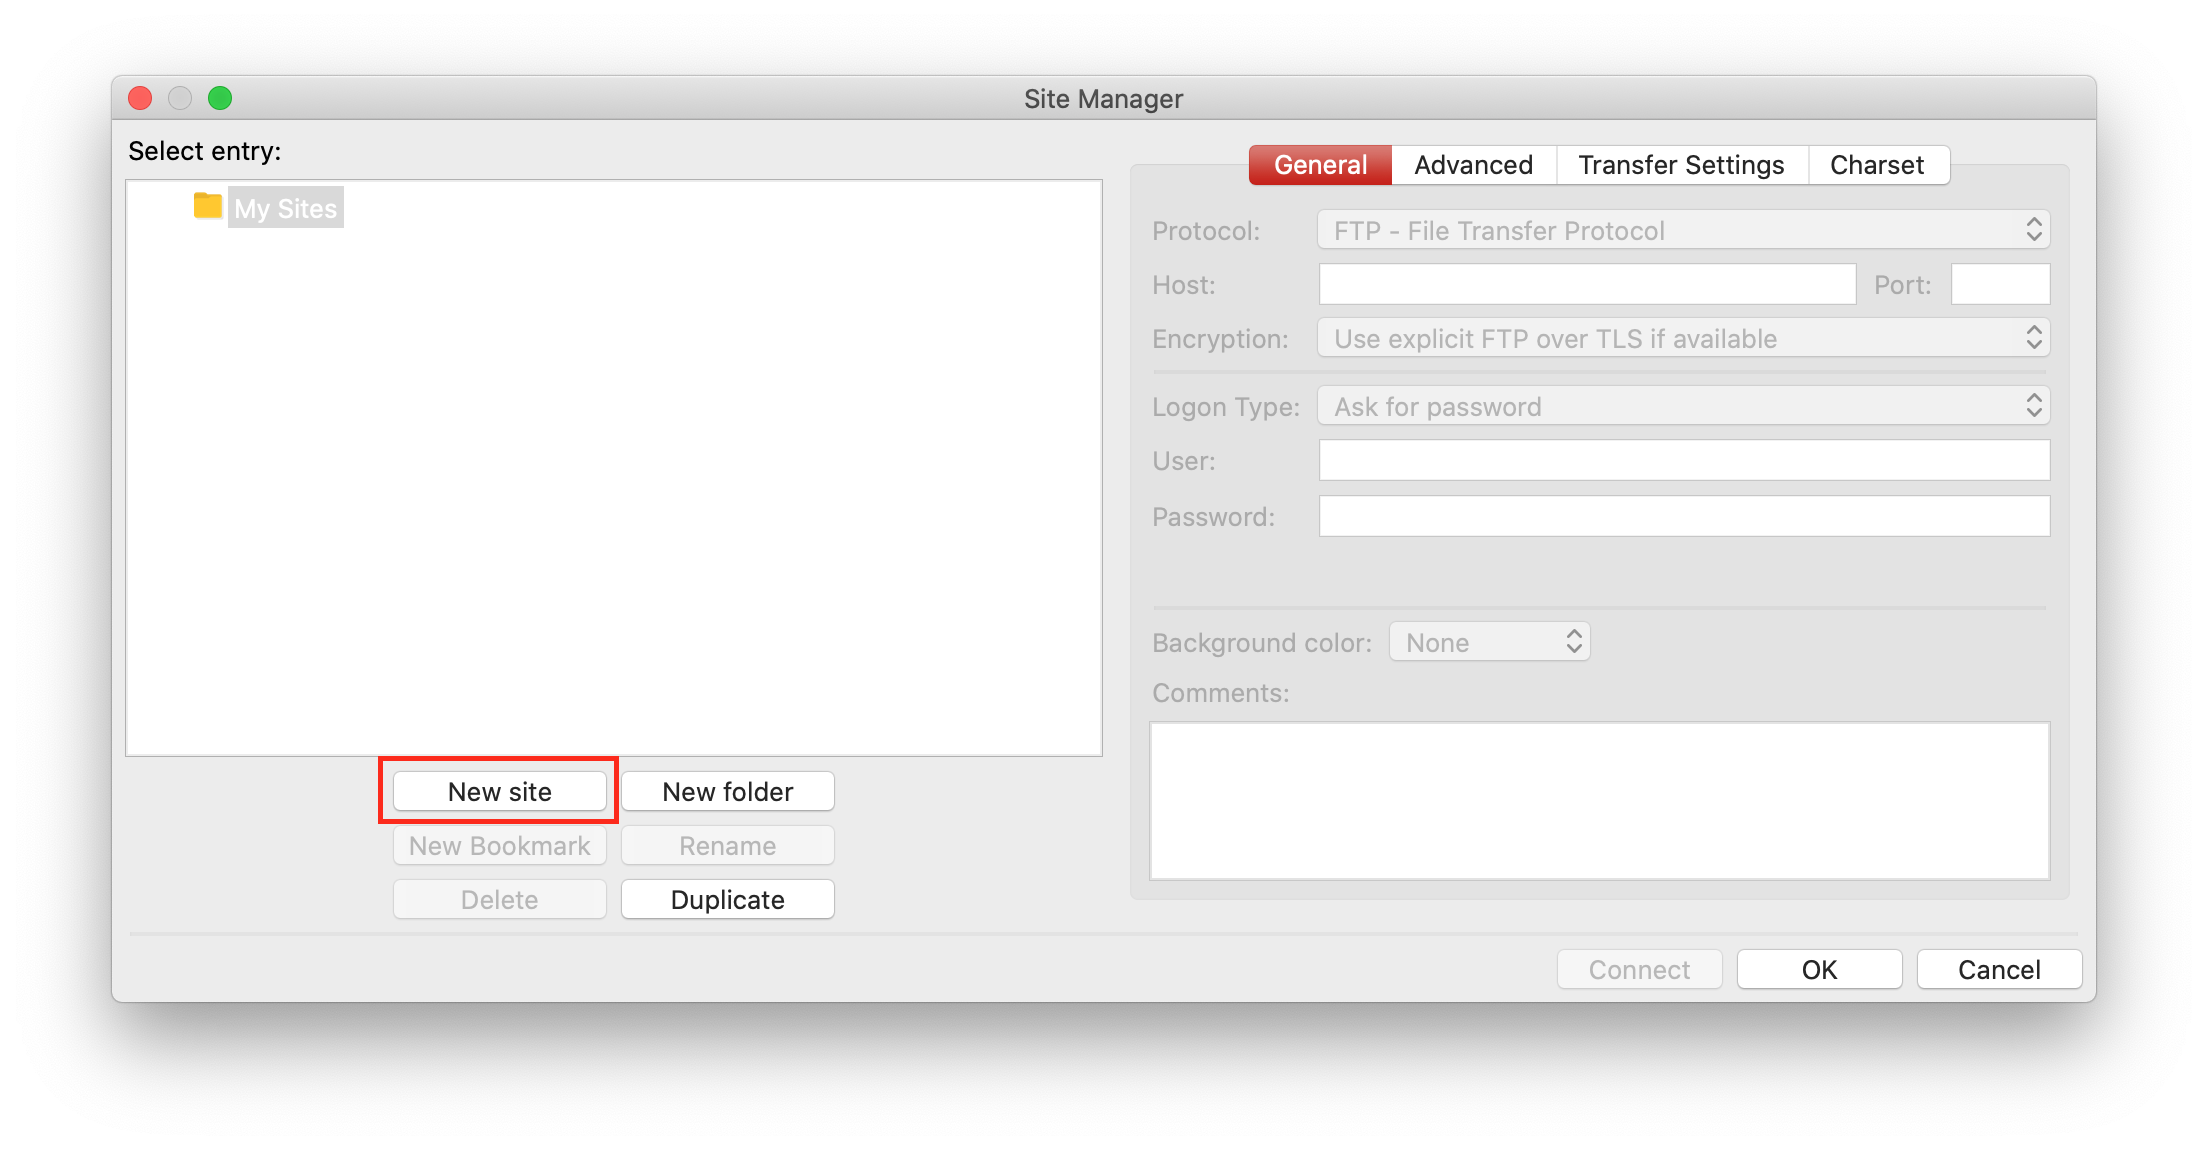
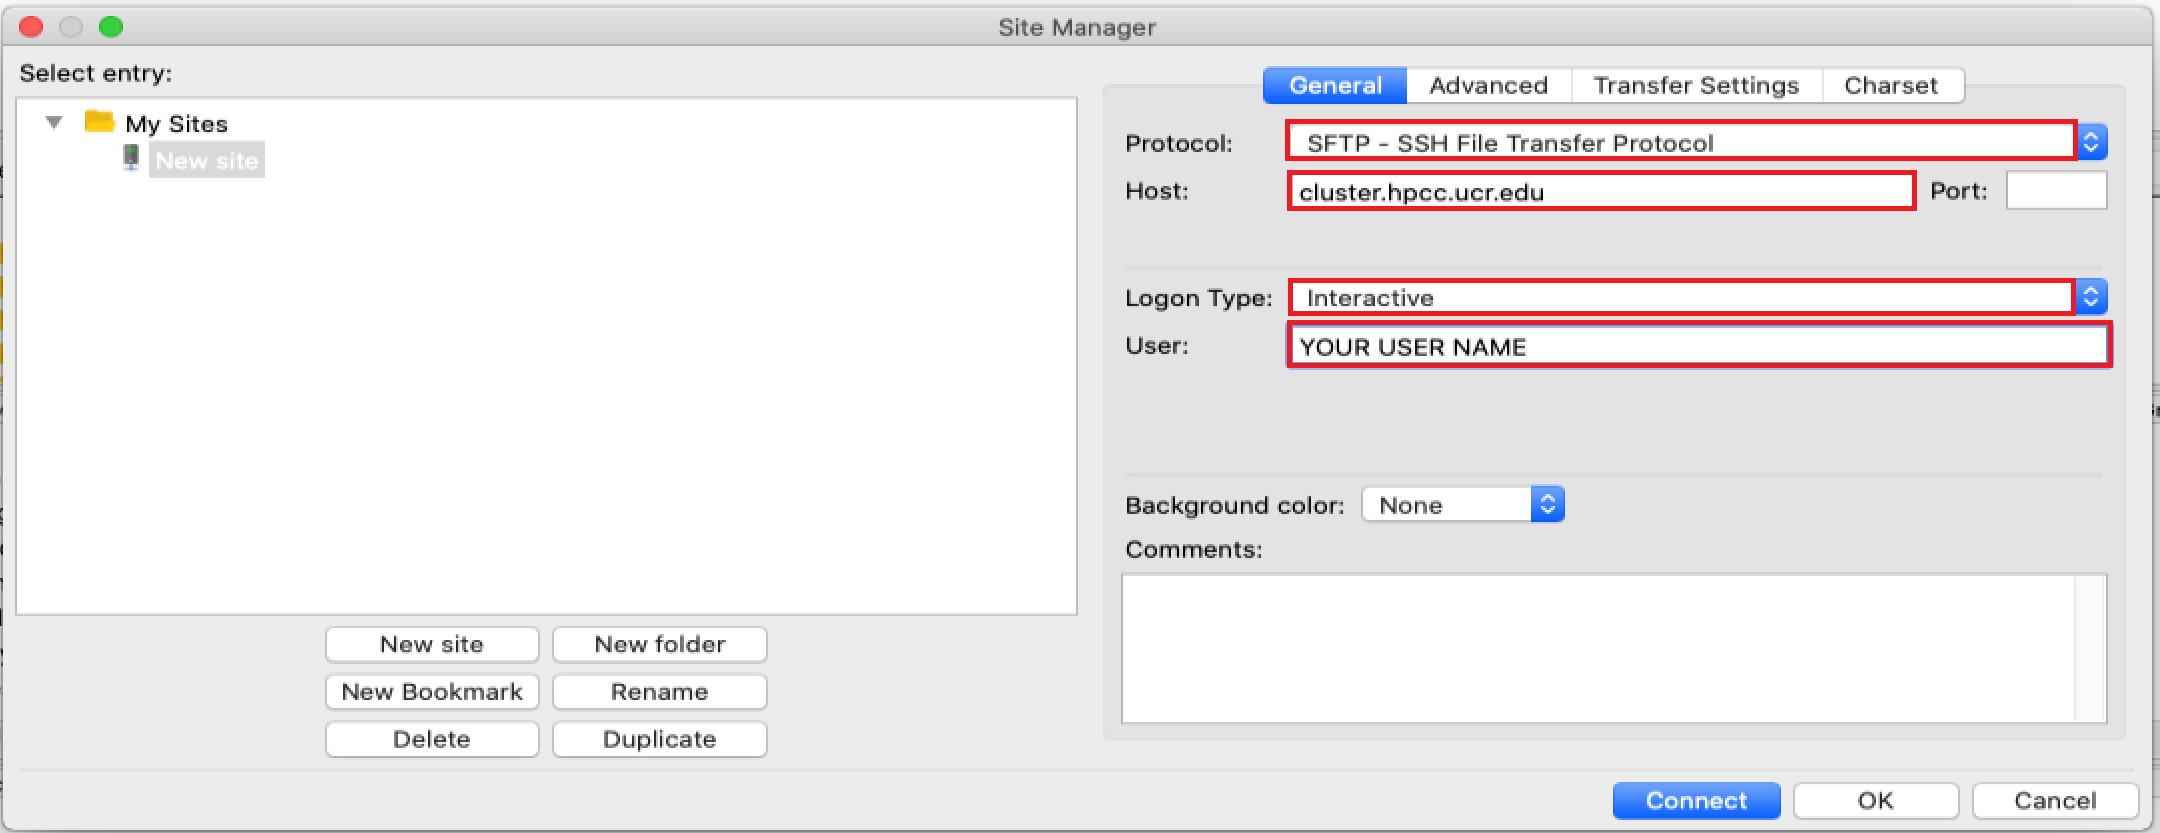
From the newly unlocked fields in the
Generaltab, fill in the following:Protocol:SFTP - SSH File Transfer ProtocolHost:cluster.hpcc.ucr.eduLogon Type:InteractiveUser: Your HPCC Username
When using
Password+DUOauthentication, you must also set the maximum number of connections. Navigate to theTransfer Settingstab and set the following:Limit Number of simultaneous connections: checkedMaximum number of connections: 1
Then click on
Connect.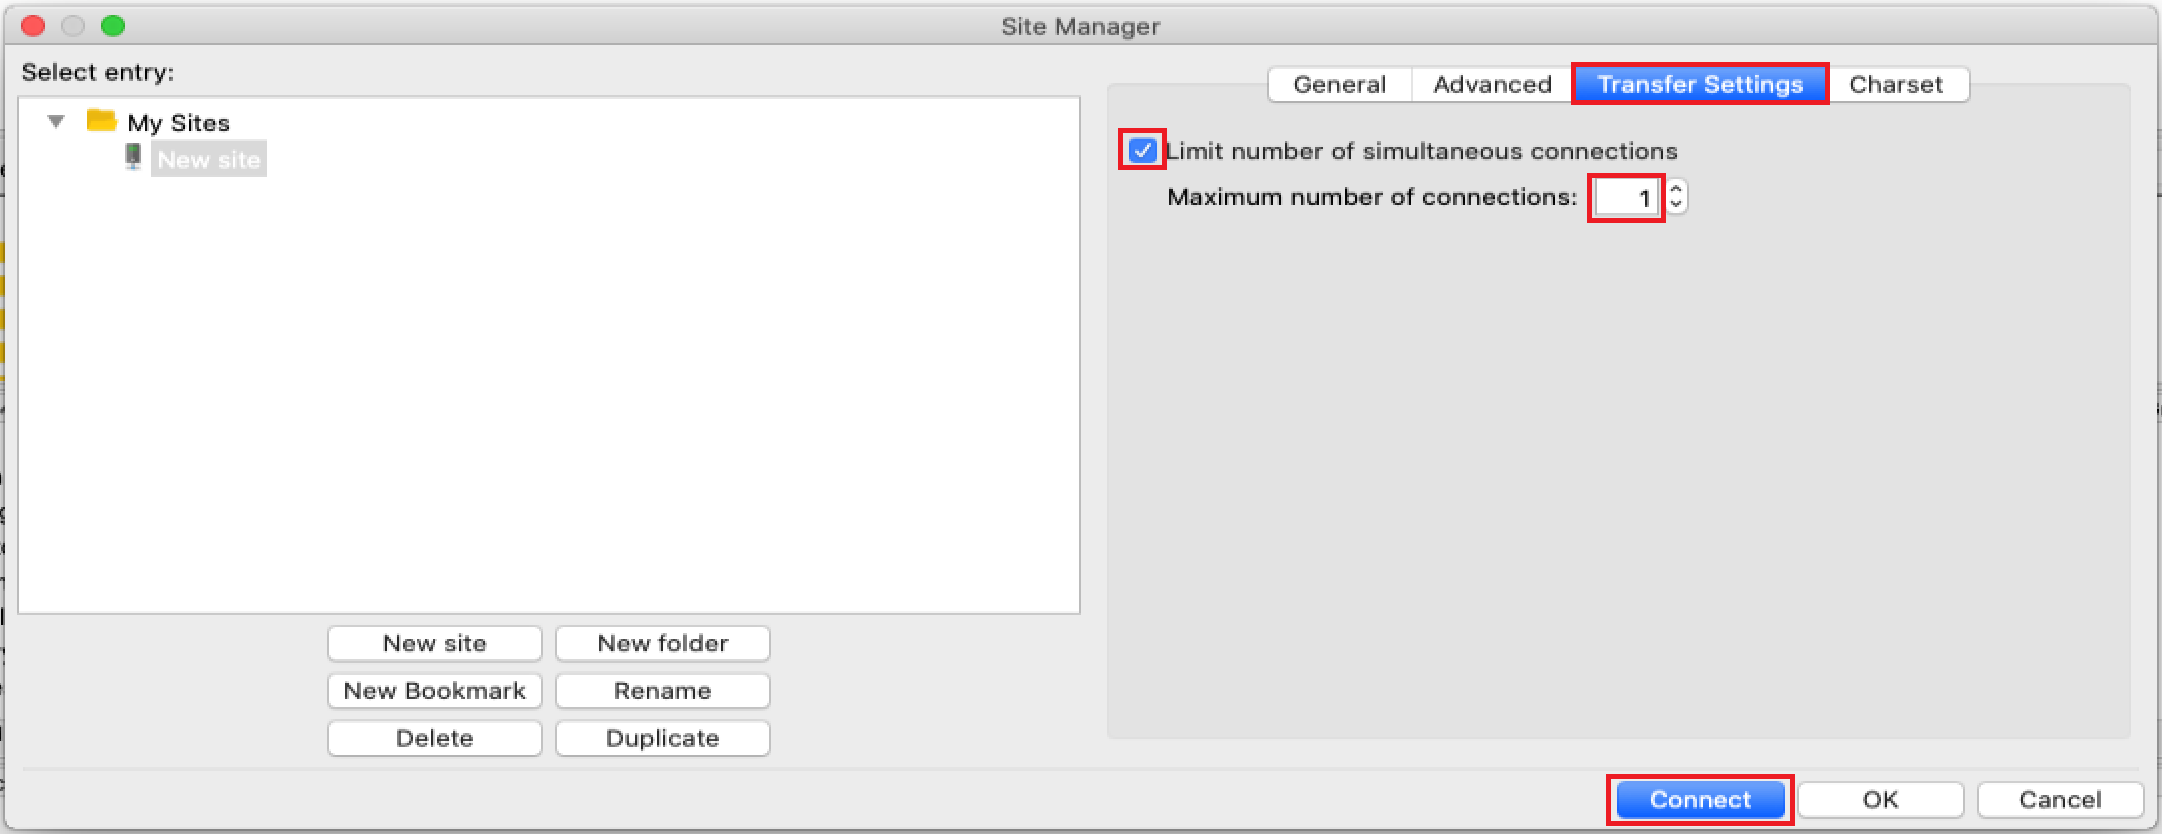
If a pop up prompts you to save your password, select the
Save passwordsoption, then click theOKbutton.Then enter in your password for the cluster, and click
OK.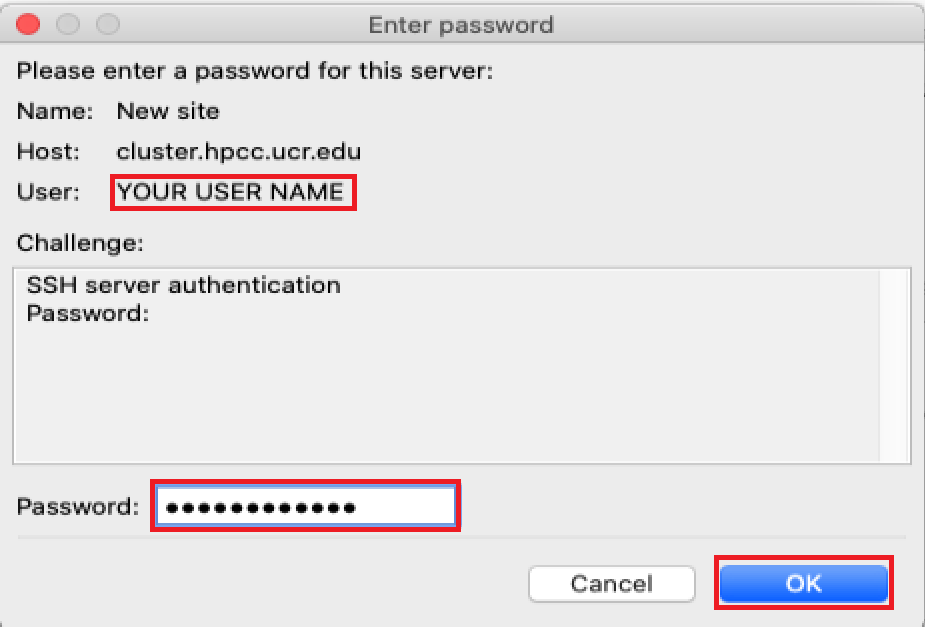
If the next pop up prompts you, then check the box that states
Always trust this host, add this key to the cache, then click theOKbutton.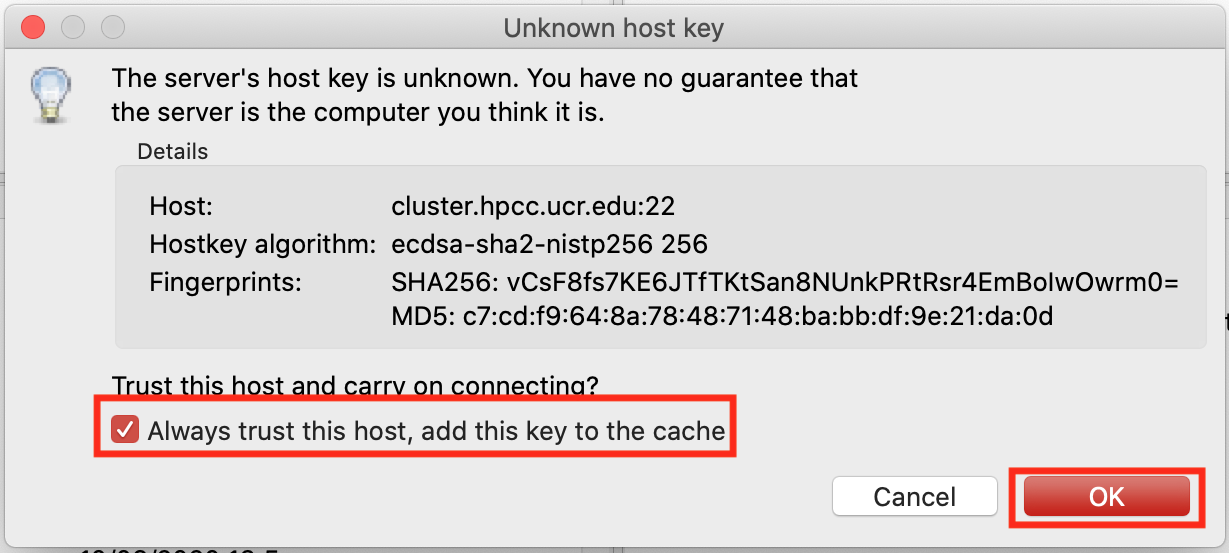
You should now see the
DUOauthentication dialog, ensure yourUseris correct then enter the number for the preferred option from the list presented, then clickOK.
Now that you are connected with Filezilla, transfer your public SSH key from your MacOS system by dragging the file
/Users/macOSUsername/.ssh/id_rsa.puband dropping it into the HPCC cluster direcotry/rhome/username/.ssh/.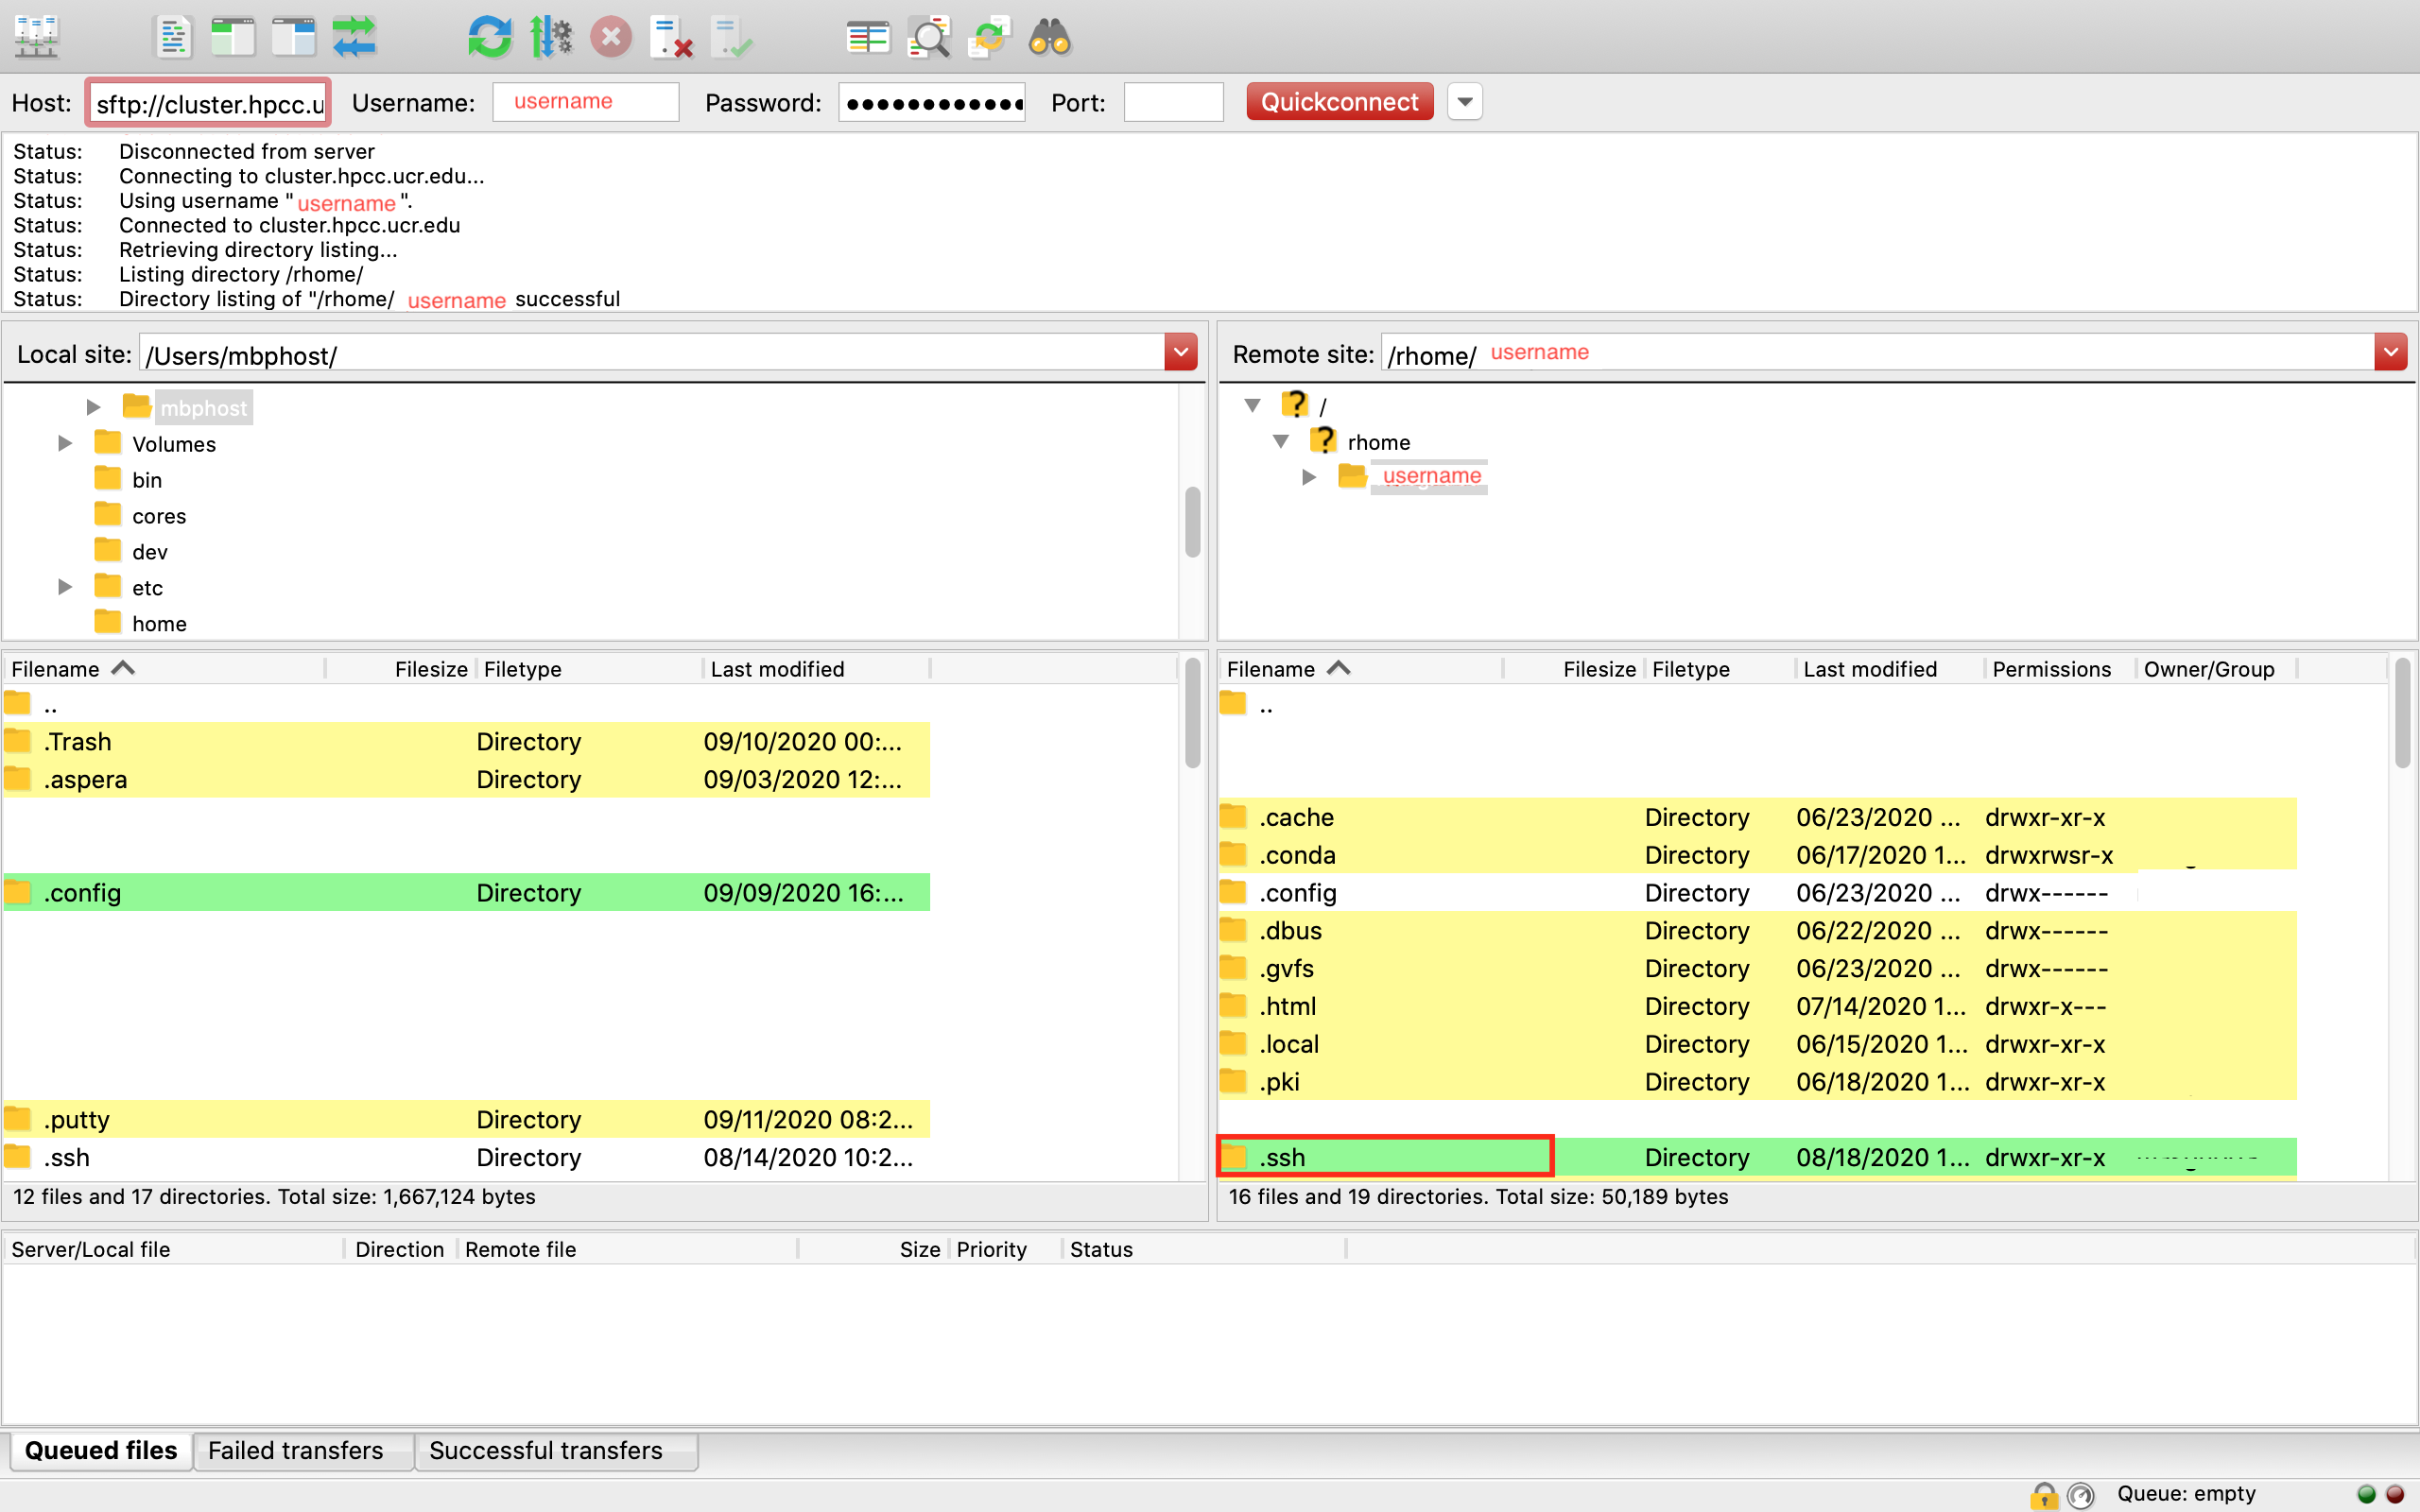
If the /rhome/username/.ssh/ directory does not exits, create it.
- Once the
id_rsa.pubfile is transferred to the cluster, be sure to rename it toauthorized_keys.
Private SSH Key
Once your public key is in place, now you can configure Filezilla to use your private SSH key and connect to the cluster through the cluster.hpcc.ucr.edu server.
Start the
FilezillaapplicationOpen
Site Managerwindow by clicking the button in the top bar of icons.Click on
New Site, rename it (optional) and press enter.Fill in the following fields from the
Generaltab:Protocol:SFTP - SSH File Transfer ProtocolHost:cluster.hpcc.ucr.eduLogon Type:Key fileUser: Your HPCC usernameKey file:/Users/macOSUsername/.ssh/id_rsa
Be sure to select the previously created private key (
/Users/macOSUsername/.ssh/id_rsa) for theKey filefield using theBrowse...button.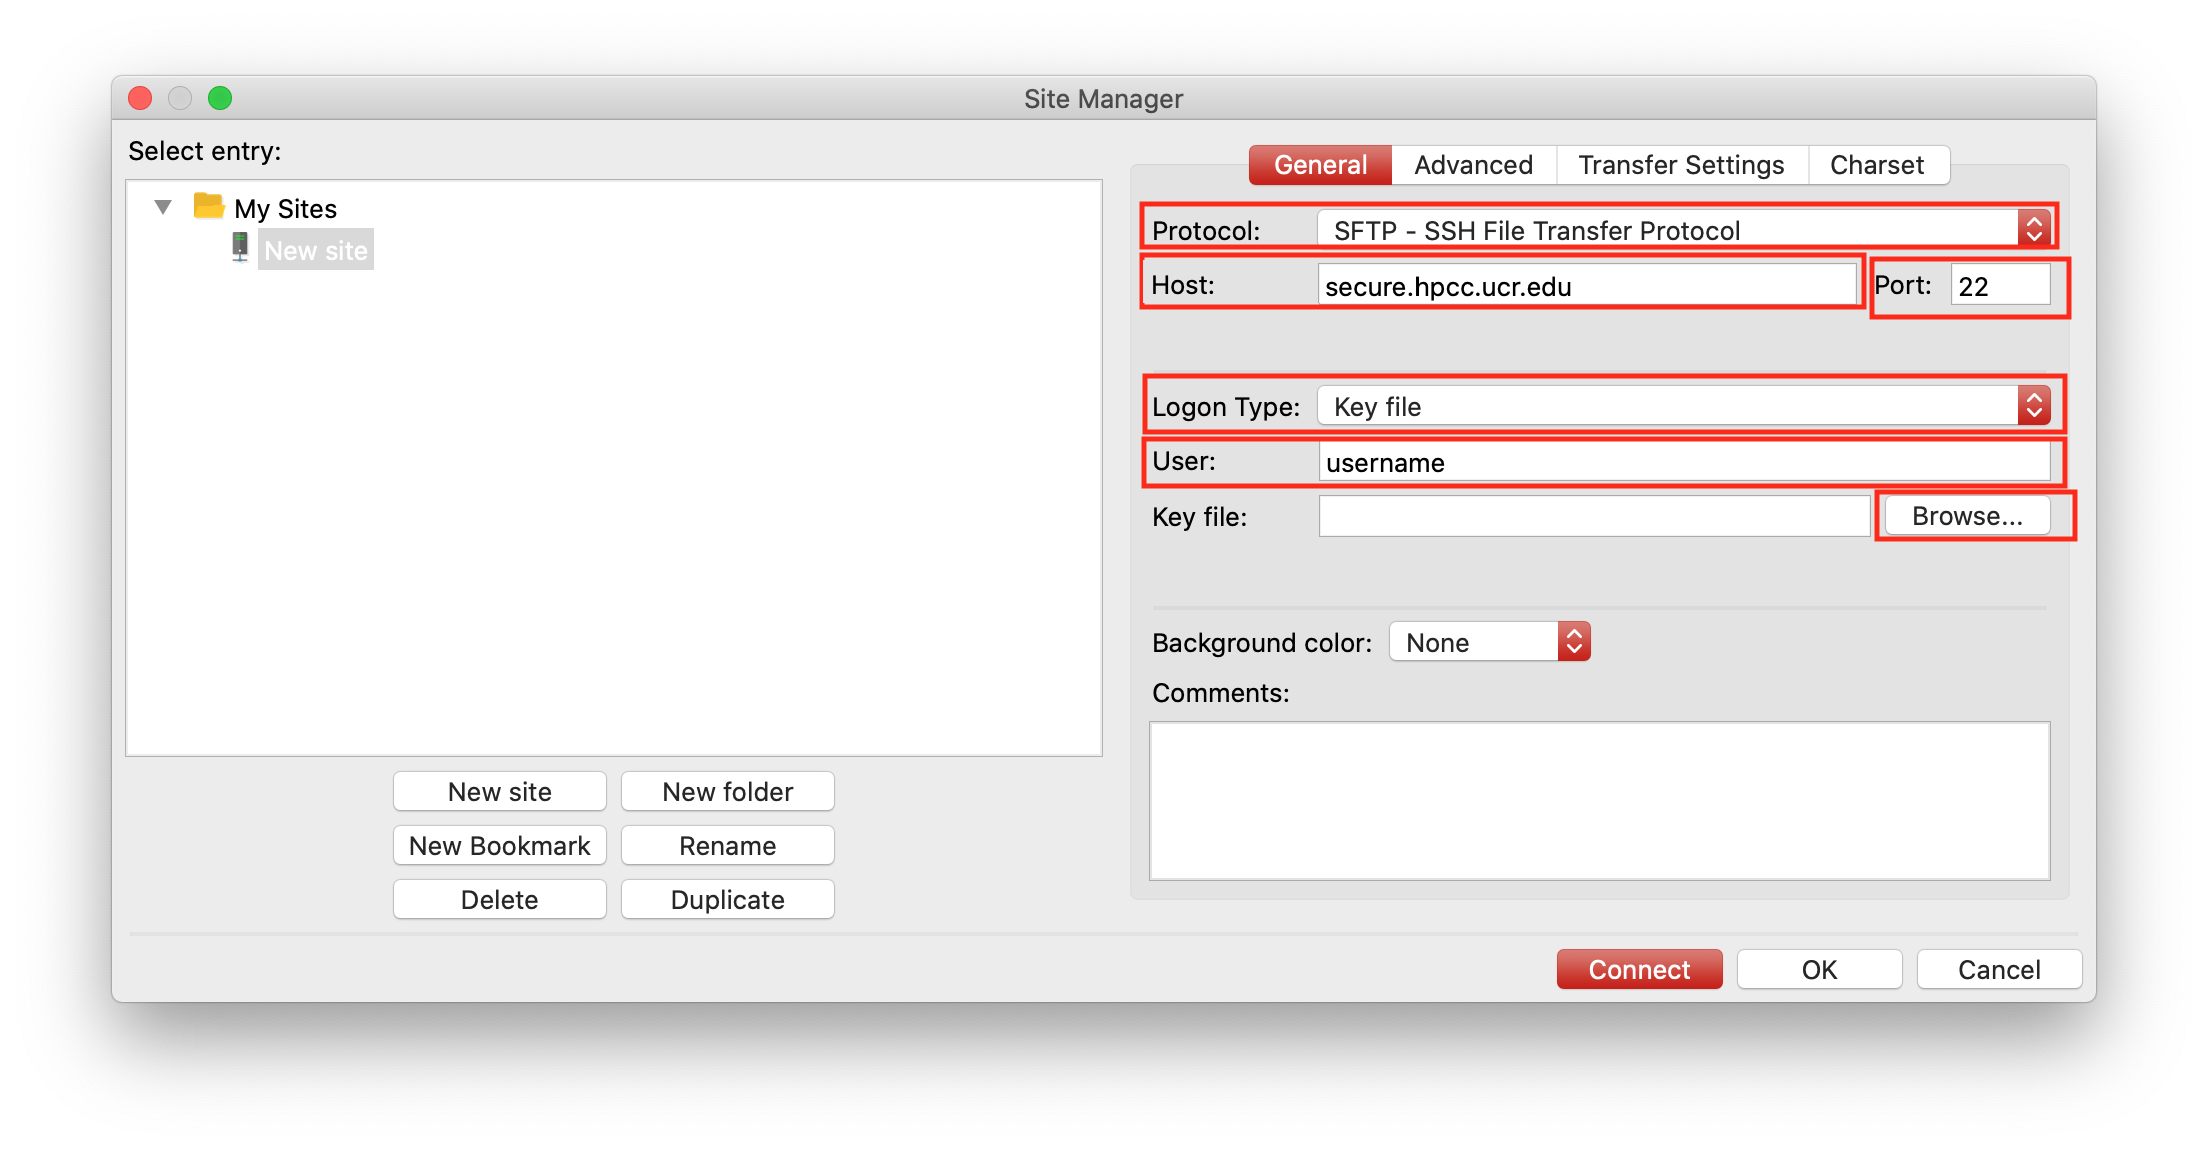
Navigate to the folder you saved your key file in (default location is
/Users/macOSUsername/.ssh) and open the private key fileid_rsa.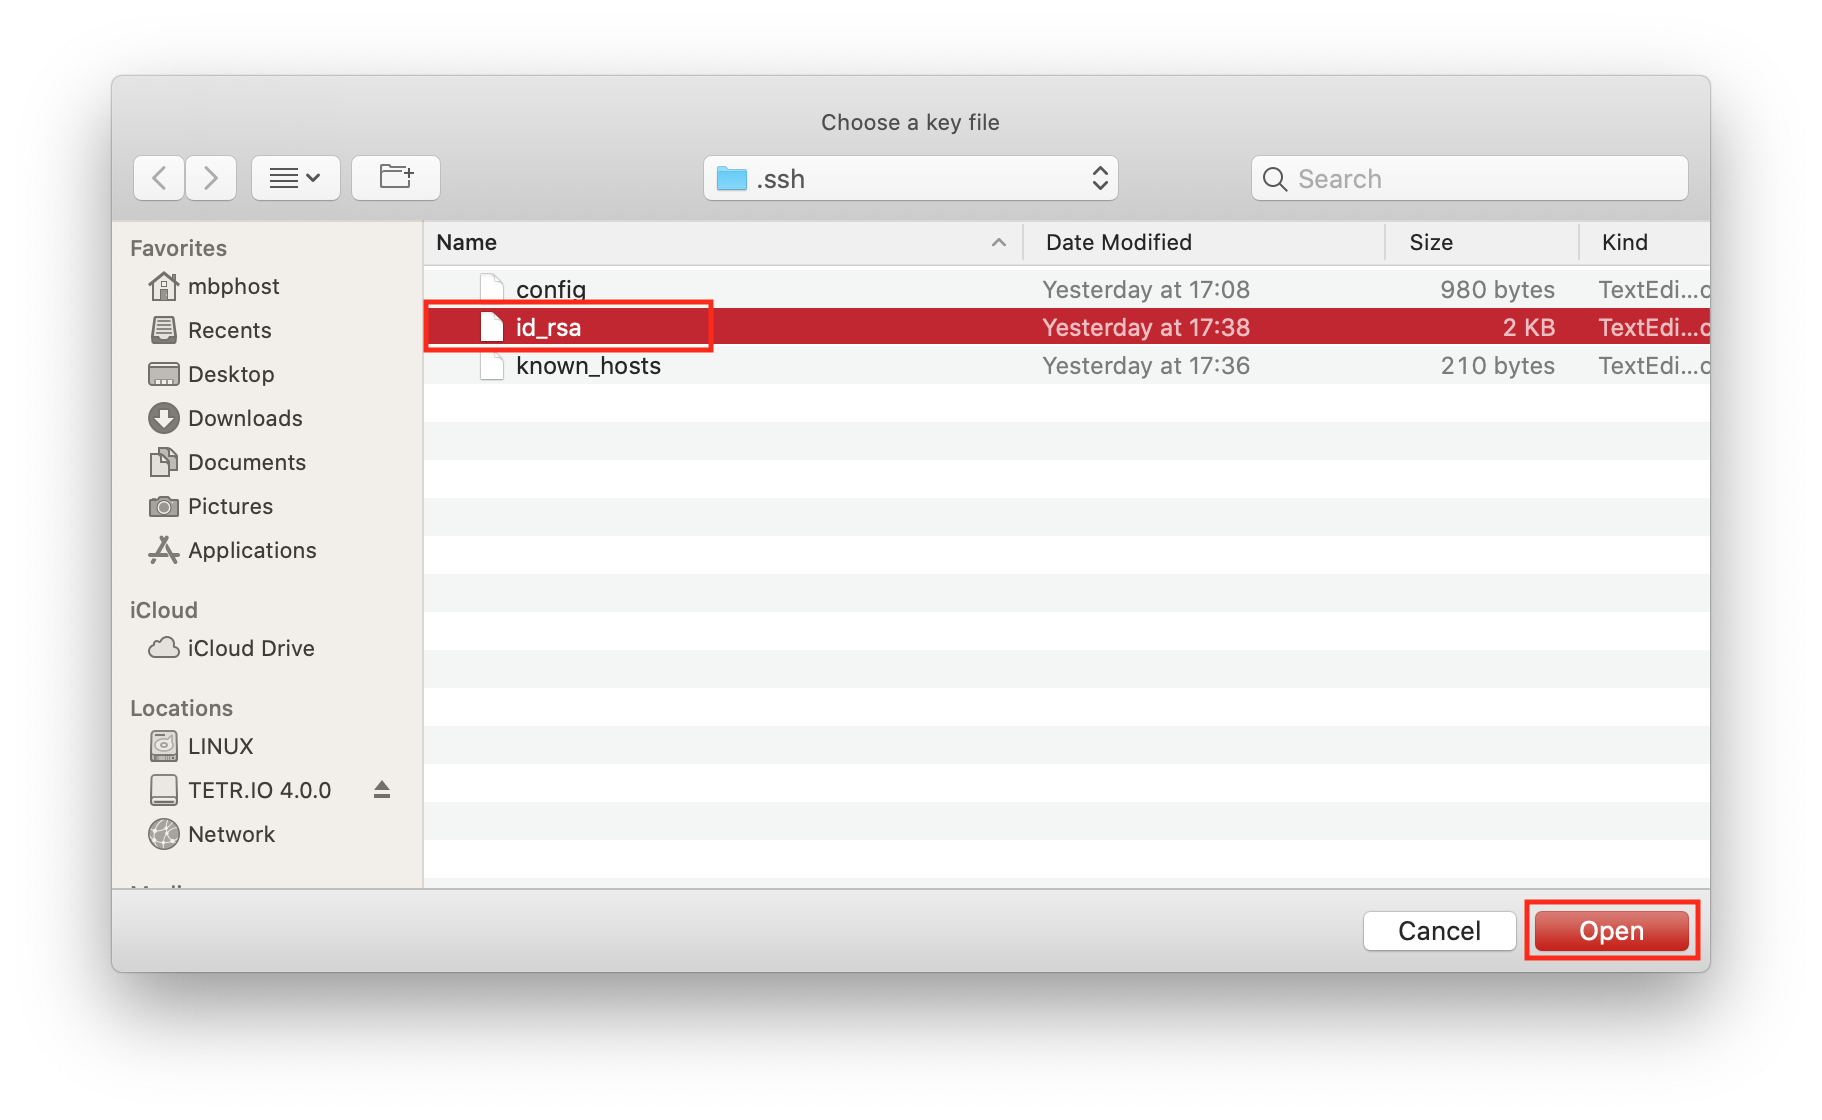
You should see the added keyfile in the
Key file:box, then clickConnect.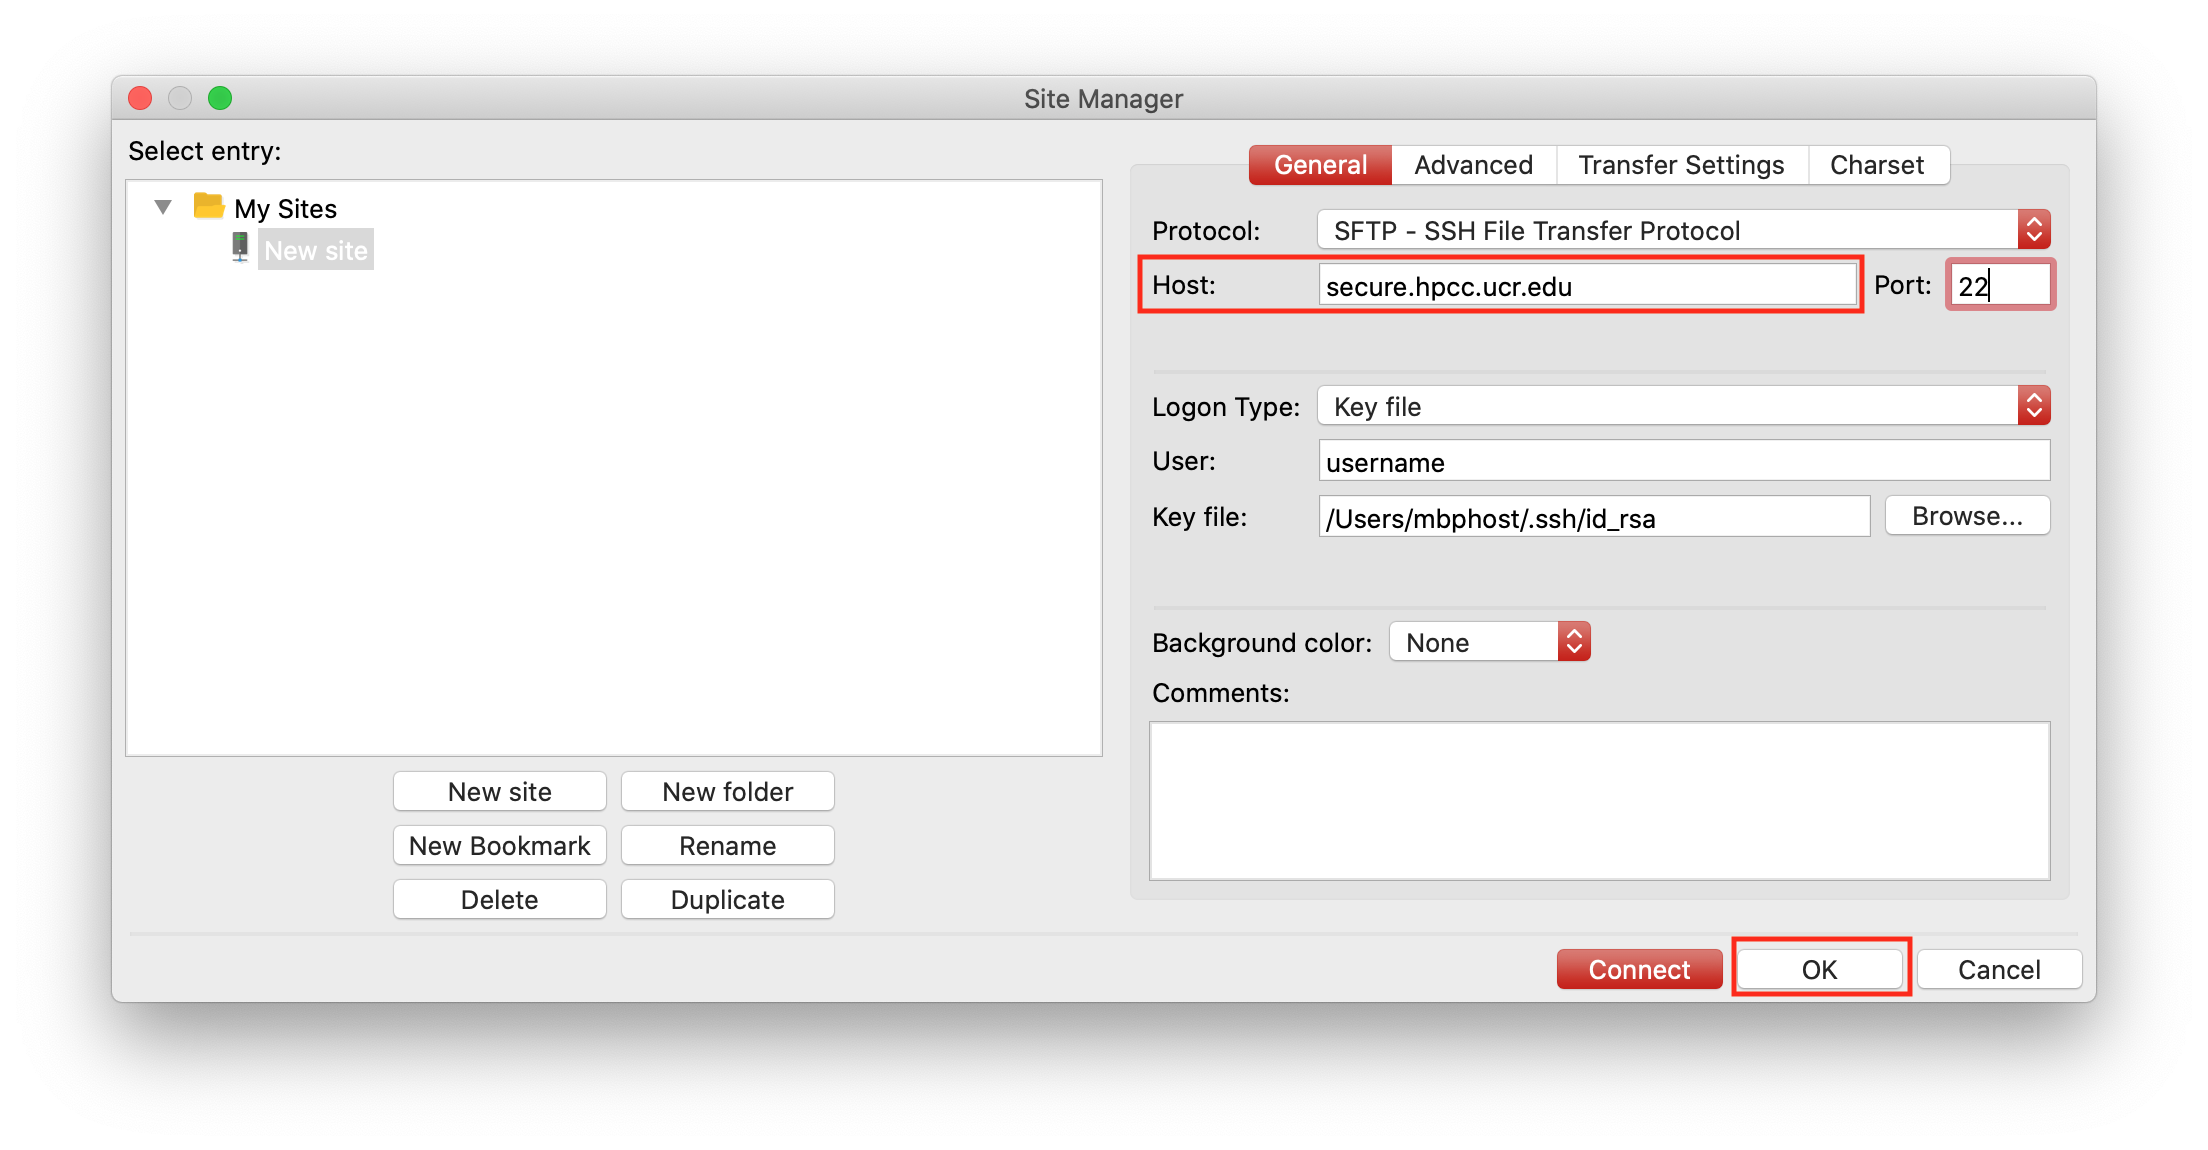
Subsequnt connections can be done from the
Quickconnecthistory by clicking on the down arrow to the right side of theQuickconnectbutton.
Remember to select the
cluster.hpcc.ucr.eduaddress.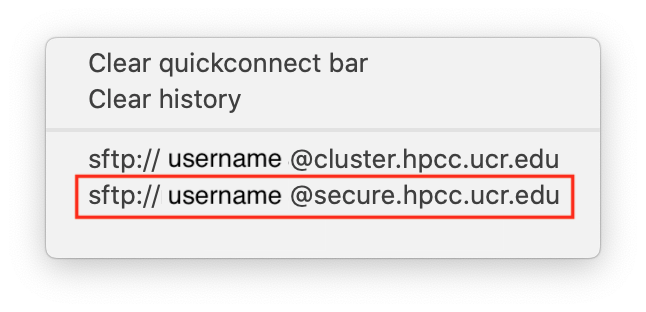
Transfer files by double clicking or drag-n-drop. For more details regarding file transfers vist Filezilla Usage.