Terminal-based Working Environments
12 minute read
Terminal IDEs
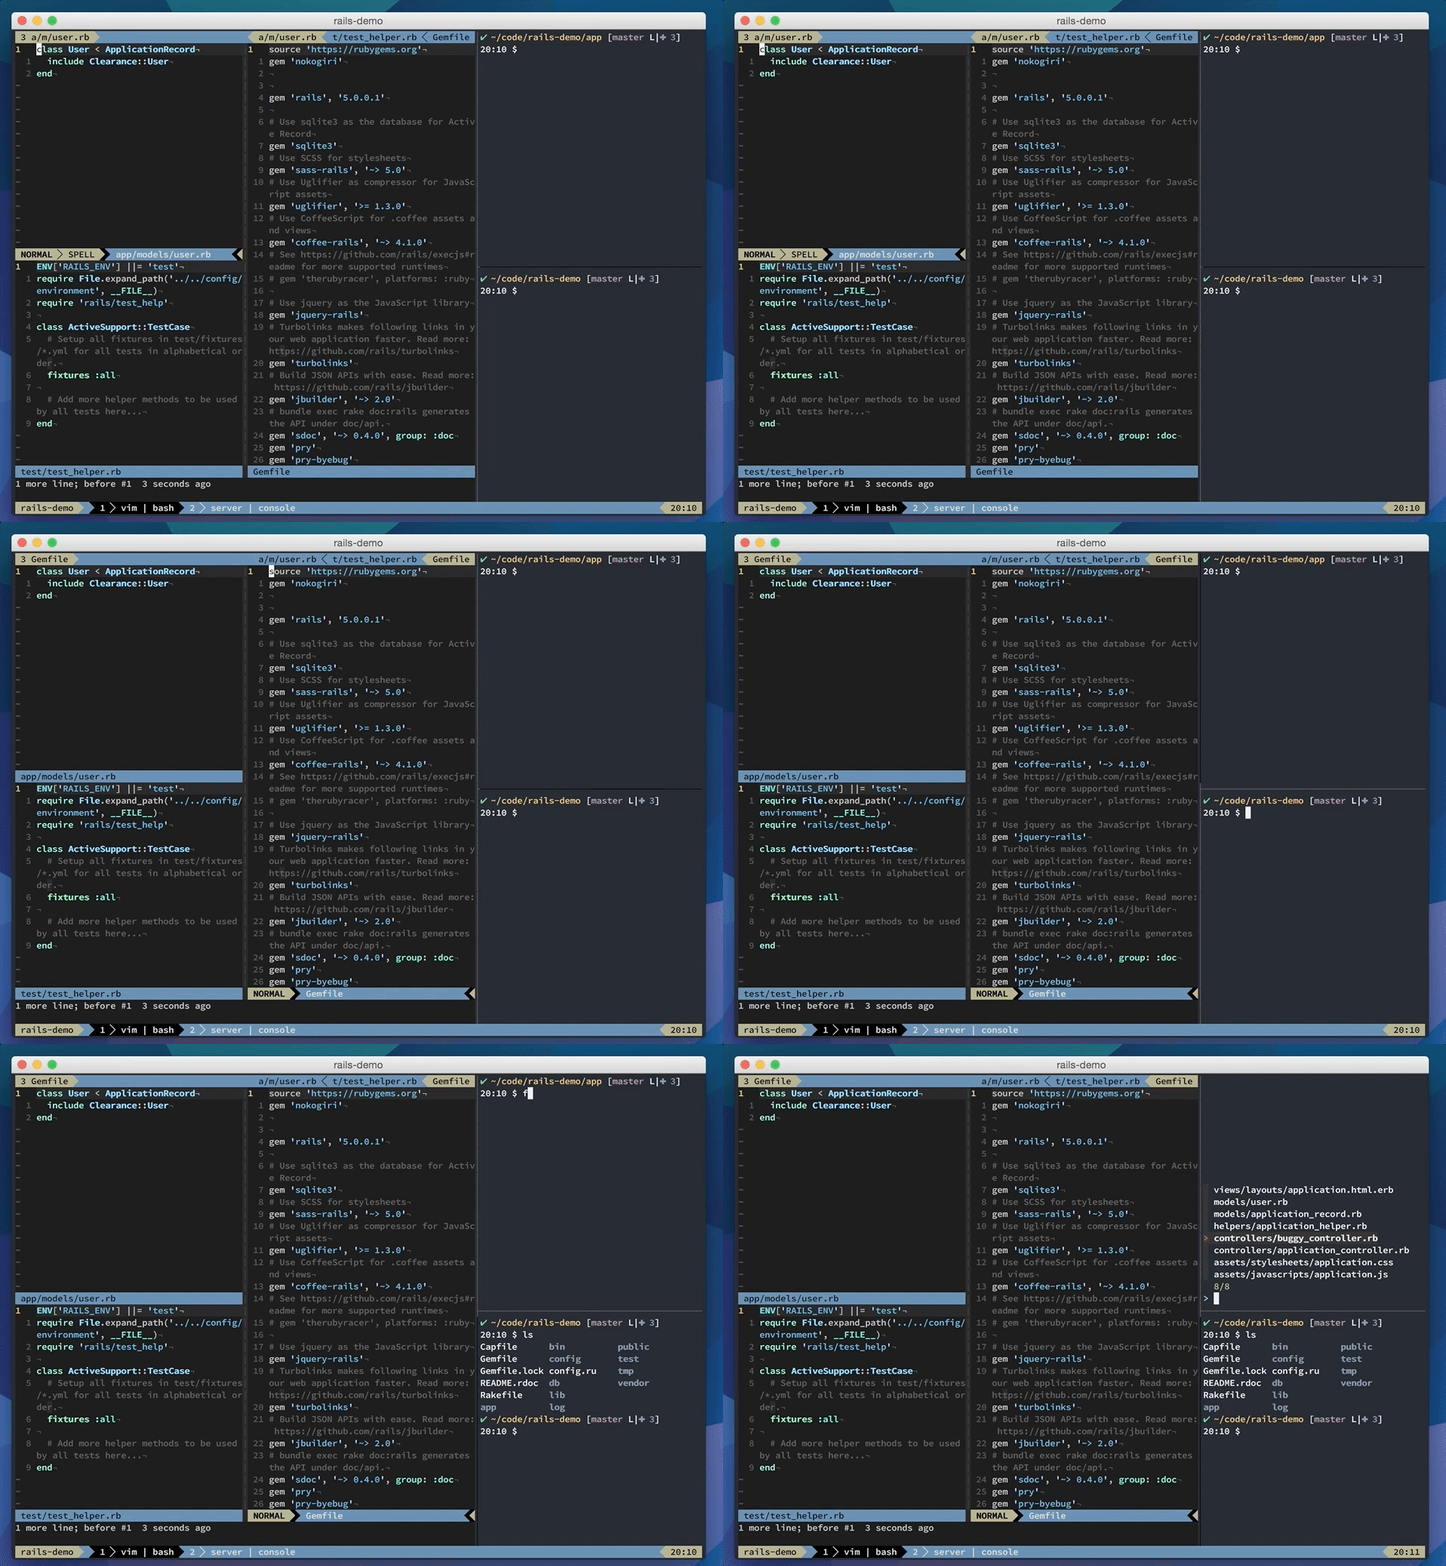
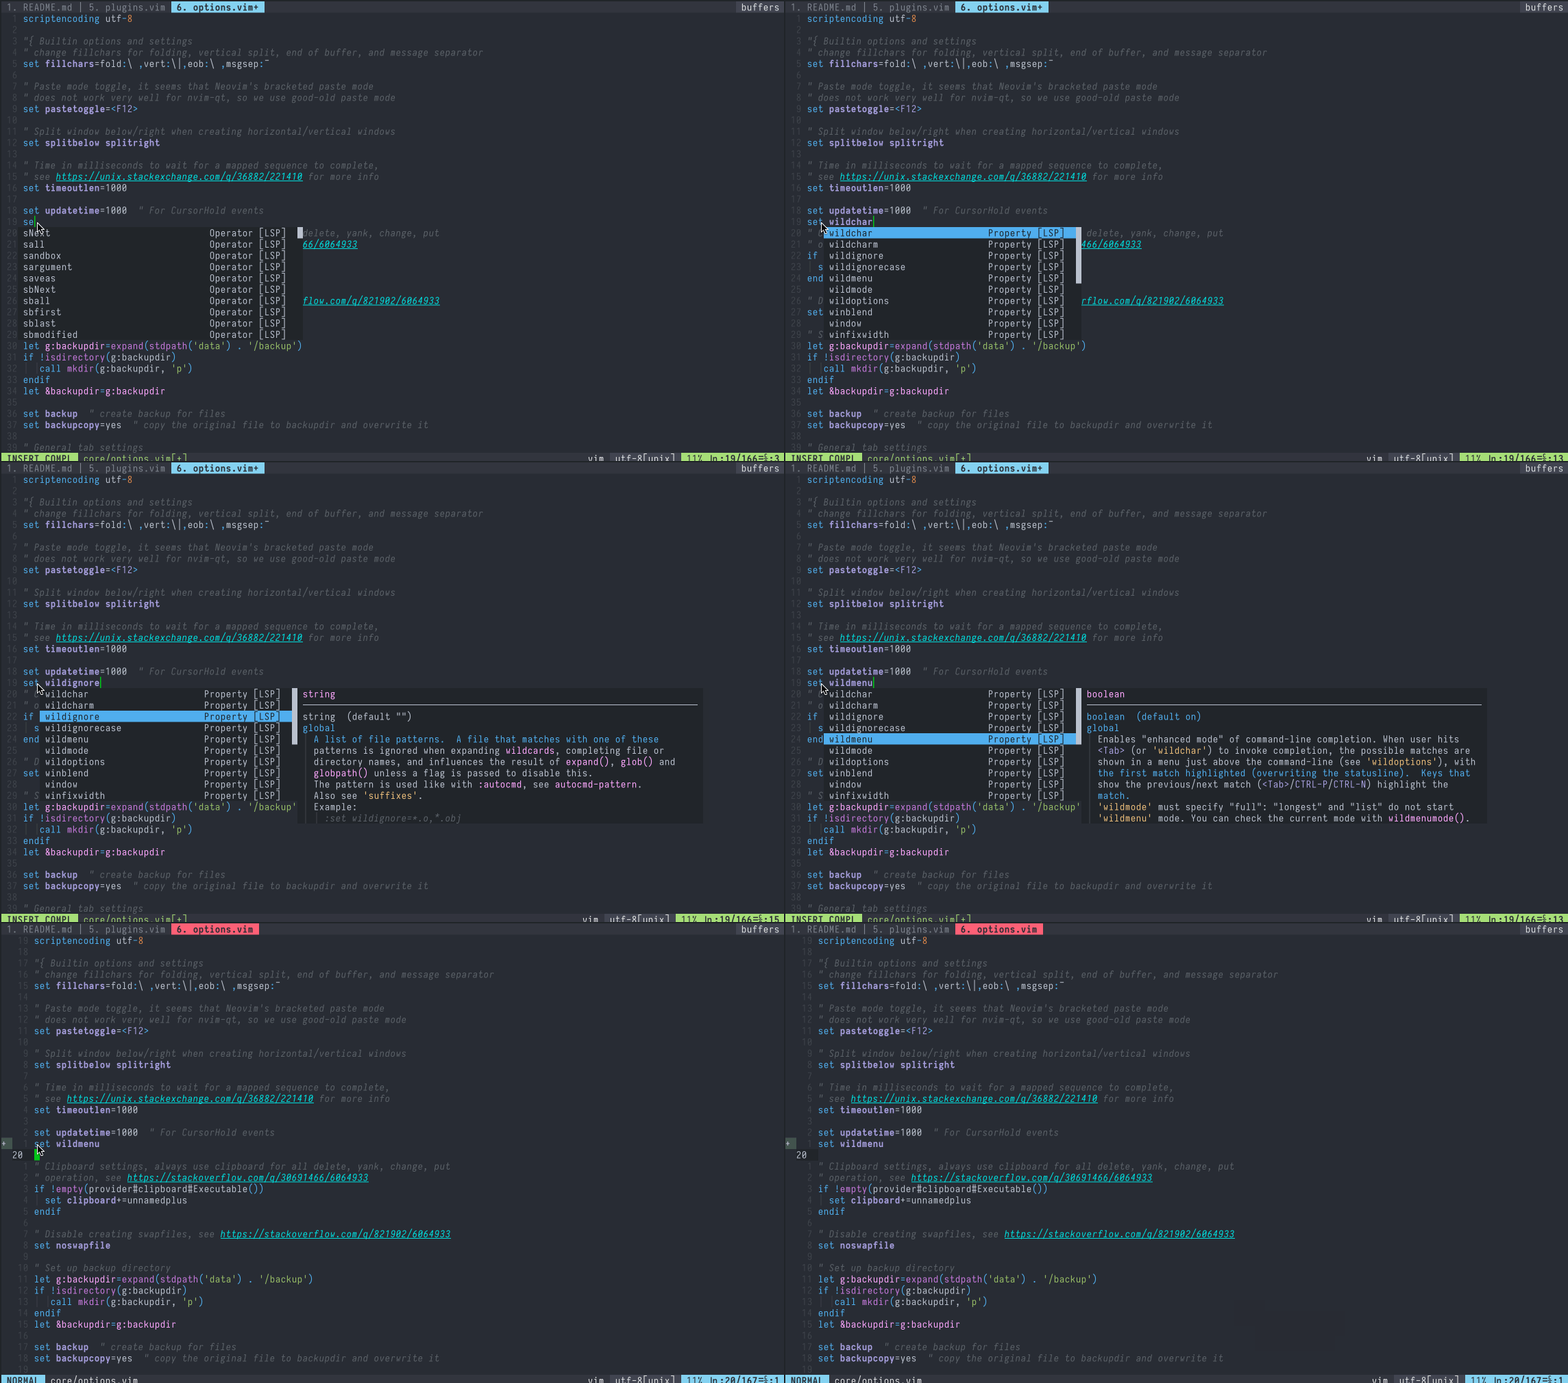
This page introduces tmux and Neovim as terminal-based working environments for working efficiently on remote systems like HPC clusters or cloud systems. They can be used independently or in combination, and provide many useful functionalities for working in local or remote terminal environments. Users who prefer a more graphical environment, VSCode might be a good alternative.
Tmux: virtual terminal multiplexer
Tmux is a virtual terminal multiplexer providing persistent terminal sessions that are de- and re-attachable. It is an incredible useful tool for terminal-based work on remote systems. Major advantages of tmux are:
- Work on remote system cannot get lost due to disconnects. One can always re-attach to a session from the same or different computers.
- Many useful functionalities ‘power charge’ terminals.
Screen is a related virtual terminal multiplexer tool that can be used as an alternative (not covered here). It has similar functionalities as tmux.
Tmux can be downloaded and installed from
here. A custom tmux (and nvim)
environment with extensions can be installed by HPCC users with a
single command (here Install_Nvim-R_Tmux). The same
script also installs several useful Nvim plugins (see
below).
Alternatively, the install script can be downloaded from
here. After installing
the provided tmux environment in a user account, one needs to log out and in
again to activate the environment. Note, installing the custom environment is
optional and not required for any of the following examples. Users also need to
be aware that the install script will make changes to their .bashrc and.tmux.conf` files. If this is not desirable, then one can install the
components stepwise, or run the install, and then undo any configuration changes by
following the instructions printed to the screen during the install.

Important considerations for virtual tmux sessions
- Both tmux and screen sessions run on the system, where they were initialized.
- To reattach to a specific session on a remote system, like the HPCC cluster, one needs to first log in to the same node (here headnode) and then re-attach to the corresponding tmux session.
- It is important not to run tmux (or screen) sessions on computer nodes since tmux sessions are persistent. Instead tmux sessions should be run on a headnode. From an open tmux session one can then log in to a computer node via
srun, or just submit jobs from a tmux session withsbatch.
Start Tmux
module load tmux: only required on systems that use environment modules, and the tmux load command is not specified in a user’s .bashrc filetmux: starts a new tmux sessiontmux a: attaches to an existing session, or a default session of a system, e.g. specified under~/.tmux.conftmux attach -t <id>: attaches to a running session selected under<id>tmux ls: lists existing tmux sessions
Prefix
The prefix for controlling tmux depends on a user’s settings in their ~/.tmux.conf file.
Ctrl-b: default is hard to type, and thus often not preferredCtrl-a: more commonly used, also on HPCC
The prefix can be changed by placing the following lines into ~/.tmux.conf.
unbind C-b
set -g prefix C-a
Mouse Support
Mouse support in tmux can be enabled with the following command.
Ctrl-a : set -g mouse on
To turn mouse support on by default, include on a separate line of ~/.tmux.conf this command: set -g mouse on
Important keybindings for tmux
Tmux sessions are organized in panes, windows and sessions themselves, where a window can have a single or several panes, and a session a single or several windows. The following commands for controlling tmux are organized by pane-, window- and session-level commands.
Pane-level commands
Ctrl-a %: splits pane verticallyCtrl-a “: splits pane horizontallyCtrl-a oorCtrl-a <arrow keys>: jumps cursor to next paneCtrl-a Ctrl-o: swaps panesCtrl-a <space bar>: rotates pane arrangementCtrl-a Alt <left or right>: resizes to left or rightCtrl-a Esc <up or down>: resizes to left or rightCtrl-a z: zoom into split pane (full window view); press again to zoom out
Window-level commands
Ctrl-a n: switches to next tmux windowCtrl-a Ctrl-a: switches to previous tmux windowCtrl-a c: creates a new tmux window; any tmux window can be closed by typingexiton the command promptCtrl-a 1: switches to specific tmux window selected by number
Session-level commands
Ctrl-a d: detaches from current sessionCtrl-a s: switch between available tmux sessions$ tmux new -s <name>: starts new session with a specific name$ tmux ls: lists available tmux session(s)$ tmux attach -t <id>: attaches to specific tmux session$ tmux attach: reattaches to session$ tmux kill-session -t <id>: kills a specific tmux sessionCtrl-a : kill-session: kills a session from tmux command mode that can be initiated with Ctrl-a :
Vim/Nvim overview
Vim is a widely used, extremely powerful and versatile text editor for coding that is usually available on most Linux, Unix and macOS systems by default, and also can be installed on Windows. The newer version is called Neovim or Nvim. The main advantages of Nvim compared to Vim are its better performance and its built-in terminal emulator facilitating the communication among Nvim and interactive programming environments, such as command-lines, octave, R, etc. Since Vim and Nvim are managed independently, one can easily install and use them in parallel on the same system without interfering with each other. The usage of Nvim is almost identical to Vim. Emacs is a powerful alternative that can be used as an alternative to Nvim.

Nvim introduction
The following opens a file (here myfile) with nvim (or vim). If nvim is not
found then one might need to load it with module load neovim first. A custom
nvim/tmux environment with extensions can be installed by HPCC users with the
Install_Nvim-R_Tmux command. For details about this install script, see the
corresponding tmux section
above.
Open file with Nvim
nvim myfile.txt # for neovim (or 'vim myfile.txt' for vim)
Tip: to always load Nvim with the standard vim command, one can add alias vim=nvim to ~/.bashrc.
Three main modes
Within Vim/Nvim, there are three main modes: normal, insert and command mode. The most important commands for navigating between the three modes are:
i: Theikey switches from the normal mode to the insert mode. The latter is used for typing.Esc: TheEsckey switches from the insert mode back to the normal mode.:: The:key starts the command mode at the bottom of the screen.
Most important modifier keys
The arrow keys can be used to move the cursor in the text. Using Fn Up/Down key allows to page through
the text quicker (more on this below). In the following command overview, all commands starting with : need to be typed in the command mode.
All other commands are typed in the normal mode after pressing the Esc key.
:w: save changes to file. If you are in editing mode you have to hitEscfirst.:q: quit file that has not been changed:wq: save and quit file:!q: quit file without saving any changes
Mouse support
When enabled, one can position the cursor anywhere with the mouse as well as resize Nvim split windows, and switch the scope from one window split to another.
:set mouse=n# enables mouse support, also try theaoption:set mouse-=n# disables mouse support
To enable mouse support by default, add set mouse=n to Nvim’s config file located in a user’s home under ~/.config/nvim/init.vim. The corresponding config file
for the older Vim version is ~/.vimrc.
Moving around
arrow_keys: move cursor in the textFn Up/Down: faster scrolling via paging.$or0: jump to back or beginning of lineGorgg: jump to end of document and back to beginningworb: move forward and backward by word)or(: move forward and backward by sentence
Important keybindings
:splitor:vsplit: splits viewport (similar to pane split in tmux)gz: maximizes size of viewport in normal mode (similar to Tmux’sCtrl-a zzoom utility)Ctrl-w w: jumps cursor to other viewport and backCtrl-w r: swaps viewportsCtrl-w =: resizes splits to equal size:resize <+5 or -5>: resizes height by specified value:vertical resize <+5 or -5>: resizes width by specified valueCtrl-w HorCtrl-w K: toggles between horizontal/vertical splits:vsplit term://bashor:terminal: opens terminal in split mode or in a separate window, respectively.Ctrl-s and Ctrl-x: freezes/unfreezes vim (some systems)
Powerful features of command mode
For example, search and replace with regular expression support. A detailed overview for using regular expressions in vim is here.
/or?: search in text forward and backward:%s/search_pattern/replace_pattern/cg: replacement syntax
Set command
The set command typed in the command mode provides access to a large number of additional functions. Only a small number of examples is given here.
For a more complete listing type :set all or consult the vim help with :help.
:set wrapor:set nowrap: toggle for turning line wrapping on/off:set numberor:set nonumber: toggle for turning line nubers on/off:set syntax=bash: toggle syntax highlighting for different languages (e.g. python, perl, bash, etc) or turn off withset syntax=off
Visual mode
- Initialized from normal mode with
v,VorCtrl + v. - Delete and copy selected text with
dandy, respectively. For paste usepfrom normal mode. The copied (yanked) text is stored in a separate vim clipboard.
Copy and delete lines
yy: copies line where cursor is or those that are selected via visual mode. Paste works withpas above.dd: deletes line where cursor is or those that are selected via visual mode.
Indentation guides
Vertical indentation lines (guides) are useful for tracking context in code. To enable indentation lines in nvim, one can use the indent-blankline.nvim plugin. Installation and configuration instructions for this plugin are here.

Help
Vim has a comprehensive built-in help system. To access and navigate it, here are some important commands. For a more detailed overview, visit this Built-in Vim Help page.
:help: opens vim help system (:qcloses it)Ctrl-]orCtrl-[: use in help to jump to tagged topic:help helphelp: opens help as a file:help quickhelpor:help index: short help overview
File browser built into vim: NERDtree
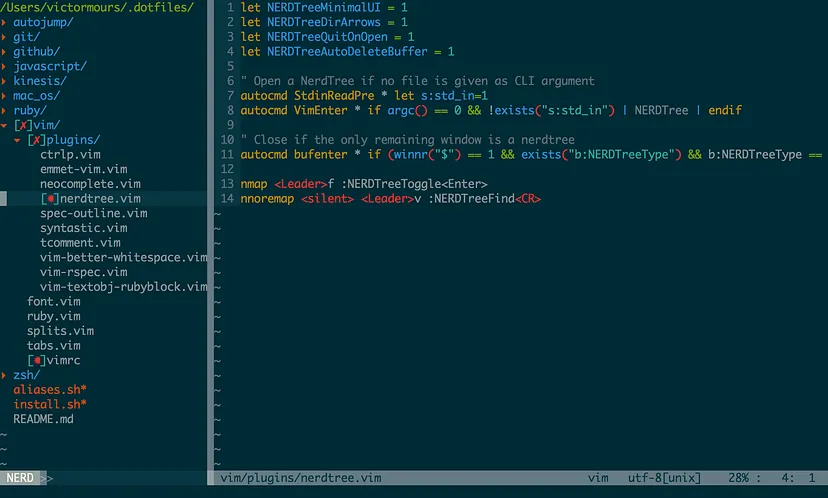
NERDtree provides file browser functionality for Vim. To enable it, the NERDtree plugin needs to be installed. It is included in the account configuration
with Install_Nvim-R_Tmux mentioned above. To use NERDtree, open
a file with vim/nvim and then type in normal mode zz. The same command closes NERDtree. Note the default for opening NERDtree is :NERDtree which has been
remapped here to zz for quicker access.
The basic NERDtree usage is explained here.

Useful resources for learning vim/nvim
Nvim for R users with nvim-R plugin
Basics
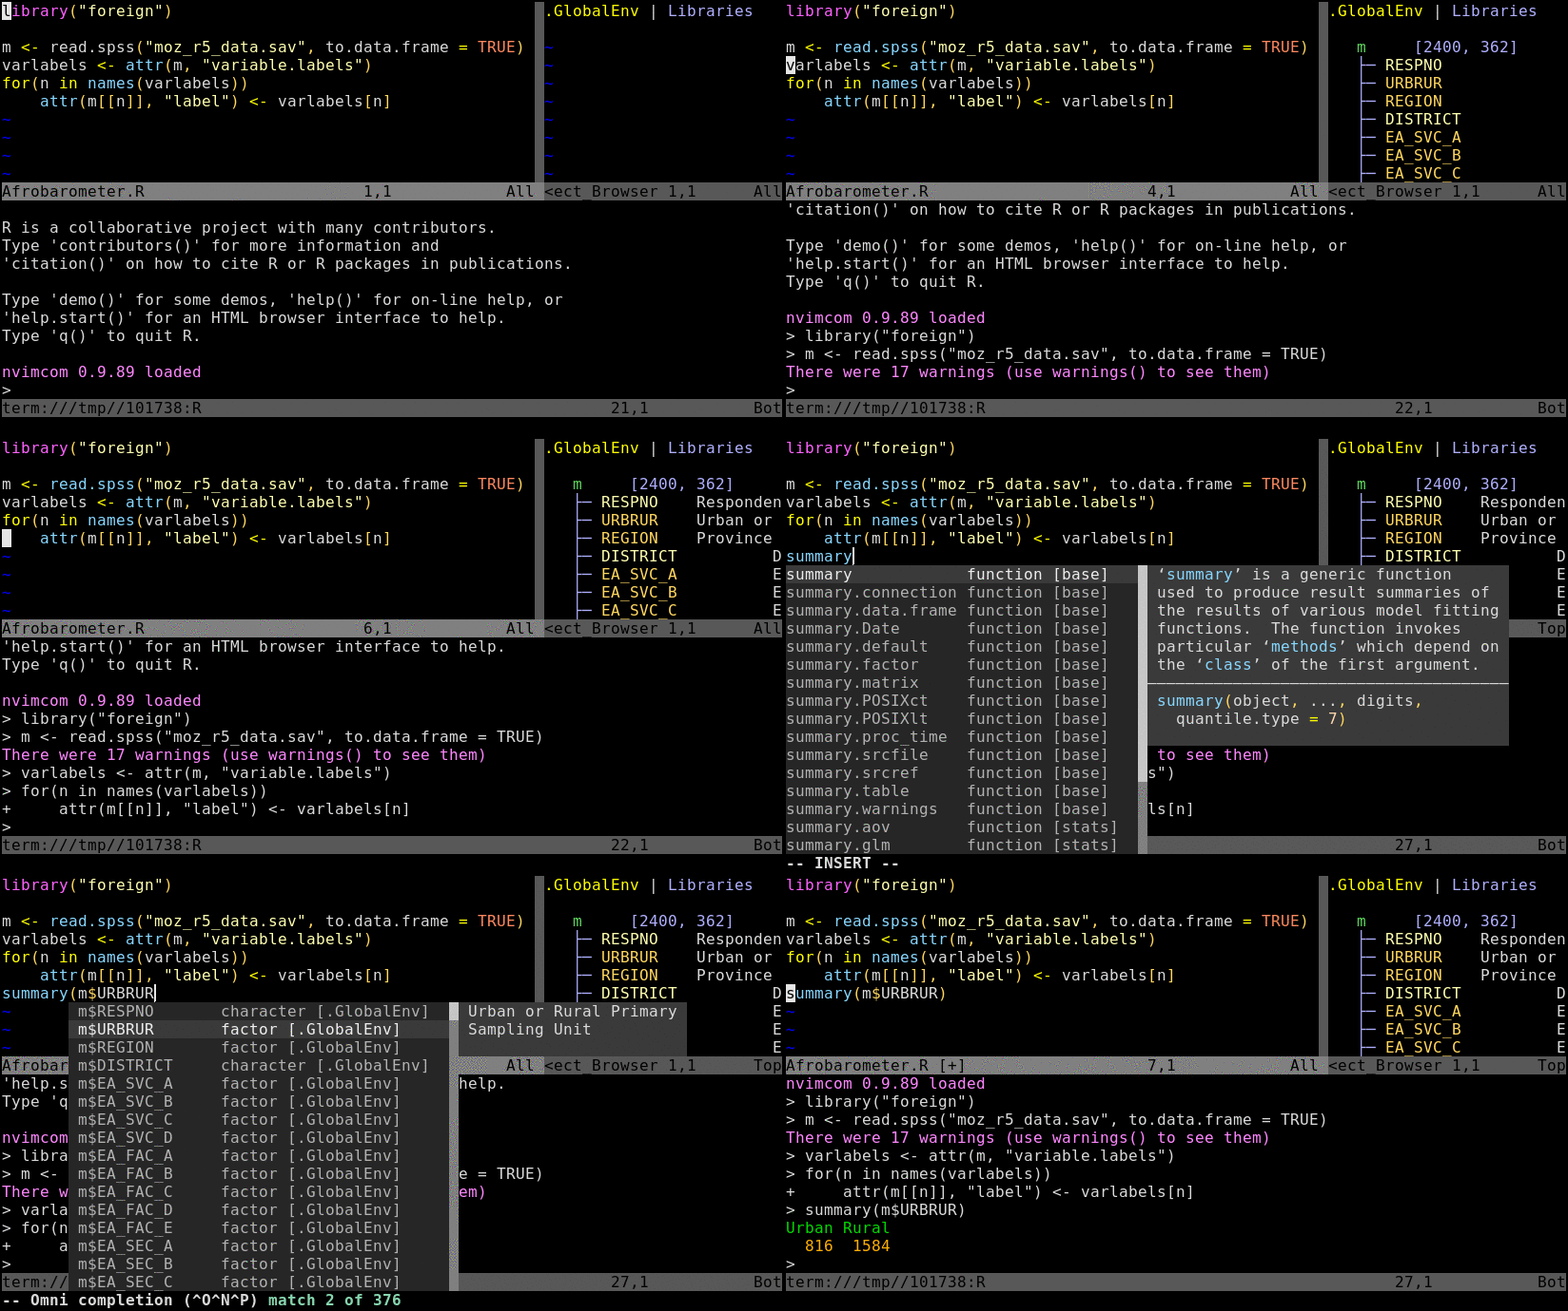
The Nvim-R plugin provides a powerful command-line working environment for R
where users can send code from an R/Rmd script opened in Nvim to the R console.
Essentially, this provides an RStudio like working environment within a terminal,
which is often more flexible when working on remote systems than a GUI solution.
It also can be combined with tmux to support ‘persistent’ R sessions that can be de- and
re-attached (see tmux session above).

Quick configuration in user accounts
The following steps 1-3 can be skipped if Nvim, Tmux and nvimR are already configured on a user’s system or account. One can also follow the detailed
instructions for installing Nvim-R-Tmux from scratch.
- Log in to your user account on HPCC and execute
Install_Nvim-R_Tmux(old:install_nvimRtmux). Additional details on this install are given in the tmux section above. Alternatively, one can use the step-by-step install here. - To enable the nvim-R-tmux environment, log out and in again.
- Follow usage instructions of next section.
Basic usage of Nvim-R-Tmux
The official and much more detailed user manual for Nvim-R is available here.
The following gives a short introduction into the basic usage of Nvim-R-Tmux:
1. Start tmux session (optional)
Note, running Nvim from within a tmux session is optional. Skip this step if tmux functionality is not required (e.g. re-attaching to sessions on remote systems).
tmux # starts a new tmux session
tmux a # attaches to an existing session
2. Open nvim-connected R session
Open a *.R or *.Rmd file with nvim and intialize a connected R session with \rf. This command can be remapped to other key combinations, e.g. uncommenting lines 10-12 in .config/nvim/init.vim will remap it to the F2 key. Note, the resulting split window between Nvim and R behaves like a split viewport in nvim meaning the usage of Ctrl-w w followed by i and Esc is important for navigation (for details see vim usage above).
nvim myscript.R # or *.Rmd file
3. Send R code from nvim to the R pane
Single lines of code can be sent from nvim to the R console by pressing the
space bar. To send several lines at once, one can select them in nvim’s visual
mode and then press the space bar. Please note, the default command for sending
code lines in the nvim-r-plugin is \l. This key binding has been remapped in
the provided .config/nvim/init.vim file to the space bar. Most other key
bindings (shortcuts) still start with the \ as LocalLeader, e.g. \rh
opens the help for a function/object where the curser is located in nvim. More
details on this are given below.
Important keybindings for tmux
See corresponding tmux section above.
Nvim-R-like solutions for Bash, Python and other languages
Basics
For languages other than R one can use the vimcmdline plugin for nvim (or vim). Supported languages include Bash, Python, Golang, Haskell, JavaScript, Julia, Jupyter, Lisp, Macaulay2, Matlab, Prolog, Ruby, and Sage. The nvim terminal also colorizes the output, as in the screenshot below, where different colors are used for general output, positive and negative numbers, and the prompt line.

Install
To install it, one needs to copy from the vimcmdline resository the directories
ftplugin, plugin and syntax and their files to ~/.config/nvim/. For
user accounts of UCR’s HPCC, the above install script Install_Nvim-R_Tmux (old: install_nvimRtmux) includes the
install of vimcmdline (since 09-Jun-18).
Usage
The usage of vimcmdline is very similar to nvim-R. To start a connected terminal session, one
opens with nvim a code file with the extension of a given language (e.g. *.sh for Bash or *.py for Python),
while the corresponding interactive interpreter session is initiated
by pressing the key sequence \s (corresponds to \rf under nvim-R). Subsequently, code lines can be sent
with the space bar. More details are available here.